

How to Build Your Own Little Free Library
When we started getting serious about buying our own place in December 2019, I knew wherever we ended up, I wanted to build a little free library. I’d seen dozens throughout Nashville over my decade of living here. They really charm up the front of a home and they have always seemed like a great way to offer something to the neighborhood.
I looked at a lot of other tutorials via Pinterest and wanted to do something unique: architecturally match the angles of my house. The ratio of the roofline, the colors. To do this, I went up in our attic to measure the peak of the house. Yes. Not a joke. I was careful, Jackson, I promise. Then I used that measurement to process the math for the little library I had sketched. Stay tuned for the full project list at the end if you’re hoping to build something similar.

I wanted a window on the front so that folks could see what was inside from the street. I snagged an acrylic panel from Home Depot for five bucks and planned my front panel accordingly. I measured out, marked, and cut most of my pieces before beginning the project. When I get the time to do home projects, it’s rarely a long window, so I have a tendency to take a kind of “baking” approach. If you’ve ever baked your own bread, you know that it’s a little work here, then a lot of waiting, then a little work, then more waiting. Substitute “waiting” for “working” and you’ve got time to do projects by slicing them up into tiny to-dos.

I used two square 3/4”-thick plywood for the walls of the library, cutting those down to size with a miter saw. My library is approximately 16” wide, 10” tall on the sides and 13” tall at the peak.

I attached the panels to each other with wood glue and then later caulked the seams with roofing caulk so they’d be waterproof. I let this whole situation dry overnight. Next, I painted the little library with a color that matches our front door (and several other color moments throughout our home). Again, I let this dry overnight.
I got some free roofing tiles from someone’s project leftovers from Facebook marketplace and attached those with some heavy-duty glue.
When I layered the singles together, I connected them with the waterproof roofing caulk.
Making the front panel proved to be the trickiest part for me. If you’re better with a saw, you could probably get a third piece of plywood and cut the acrylic size window directly out of that, but I am not so skilled. I went with smaller pieces and then added extra trim I had laying around from the bedroom picture frame trim project.

Materials ($61 total)
two 23/32”-thick 2x2’ plywood panels ($16 ea)
wood glue ($5)
magnetic closure ($3)
sample size paint of your choice (usually $5; ours is Noble Blush to match our doors)
roofing shingles (I found some for free and imagine this is easily done, but if you need to buy some, try to match your own roof with some of these for $34)
Tools
miter saw
level
tape measure
clamps
patience
I like to stock our little free library with a couple additional essentials that might be useful to our neighbors or those in need and walking down our street. I added bandaids and a few spicy ramen meals from Trader Joe’s because they are delicious. I try to remember once a month to add a few extra canned goods or “just add water” things to the pantry portion. Otherwise, I added some novels—a good mix of genres—and then shopped for some kids books at McKay’s to add to the stash. Even better, our neighbor across the street is an inker for DC so they contributed some amazing comic books (which went quickly, to no surprise) and other neighbors have swapped out books for their own. The whole idea is that people can freely take and freely give items to our little community here.


My little library’s first magnetic closure was unsuccessful. When I was away for a girls weekend, Jackson surprised me by inviting Andrew and Alec and the three of them knocked out some home projects, including reattaching magnetic closures and the acrylic handle that had arrived from Etsy.

The roof survived its first snow with zero leakage! Yay yay! Next on my to-do list is to order an official plaque on the Little Free Library Project website and get registered on their map. Unofficially, of course, our whole neighborhood now knows where they can get a good book!
Are you considering building your own little free library?
xo,
em

Front Yard Color
I’m not saying we started from the bottom, as the song goes… but we definitely did NOT start at the top and now we are HERE. Ok we’re not there - as in the point of complete cuteness and porch amazingness that I would like us to achieve. But here is a good spot - it’s got a fence, greenery I (mostly) don’t despise, and a porch that isn’t soggy.

Yes. When the folks who renovated our house got to the porch, they looked at it and said “Let’s add some plywood.” Wait, WHAT? Like on the outdoor surface? That gets wet? They added plywood — a material that is notorious for folding in damp conditions? Yes. Sadly. Yes. To the left you can see what the front of our home looked like in the listing photos when we purchased it. Can you say “zero curb appeal”?
We discovered as much when the porch started feeling SOGGY. Ew. By November, we’d gotten nervous. By December, we’d contracted a builder. By the end of February, I’d accidentally fallen through the porch with my foot (over which I put one of my hand orange cones). Fortunately, the builder was scheduled to work one week after I’d stomped through the sogginess. And work he did! In a mere two days, Keith yanked out every rotten board and replaced it with well-spaced, quality wood. We are so relieved! We took the chance to add a hand railing to the porch because I’ve always thought it looked both silly and unsafe without it. For the back of the porch by the swing, we opted for a green wall (more on that later as it grows).
Last spring, I pulled out all the ugly that I could, left a few of the larger greeneries in place, and set to work on bringing more pink into the world. You can tell I was fully in denial of the fact that palms don’t grow well in Tennessee by the recent purchase next to the door. We had yet to put up the swing or replace the door, but isn’t it already so much better?

This year, I wanted more color. I’d already updated the door to the door of my dreams (pink border around full glass window! and yes the natural life is SO worth it). I had plenty of pink. So I figured I’d start by seeing what stuck around from the year before: the tulips came back in March, the bushy broccoli lookin’ things returned and were full and happy, the hostas are doin’ the most. I still dislike the three brighter green buddies that get a little stringy and can turn yellow-red-orange-brown splotchy randomly. But I digress.
We turned to Gardens of Babylon for some inspiration. And now we want a moss wall. And we definitely are going to do some espalier with fruit trees that grow decently in Tennessee (Jackson has taken over as our residential not-in-denial-Reimers-in-charge-of-plant-selection).


We selected some perennials from GoB to accompany a few annuals that I’d gotten early at Homie Deeps (I knew the prices on hosta would be unnecessarily absurd at GoB). Below is our new porch (waiting to be painted and stained) with the greenery as it had grown back in this year. Ok, plus all the weeds!

And here is the update with our bits of color tucked in! I only had enough mulch for the smaller of the areas so I’ll be doing that later this week. Colors were inspired by the fading floral arrangement you can see on the sill: these were my sister’s anniversary flowers from her boyfriend, made by our fantastic florist neighbor across the street, Tara! Add to the some day list: cut flower garden.


Po clearly had a blast playing in the hose spray (his fave summer activity) and seems to know not to go into the garden box anymore. We’ll see if the NEW PUPPY we’re getting tomorrow can learn the same trick!
xo,
em

How to Add Custom Picture Frame Trim to Your Home

[image: my bedroom, which has blue walls with picture frame trim, a plant, a large low bed with white bedding on which my dog is sitting]

BEFORE
This image is from the listing of the home before we bought it.
[image: a room staged with white and orange furniture and beige walls]

AFTER
Surprisingly, the trim and large bed make the room feel much bigger than before.
[image: the same as the first image on this web page]
This master bedroom from Alisa at A Glass of Bovino was probably the most helpful walk-through from scratch to final product on the trim. Reading her post also showed us just how impactful a bit of trim could be. All in, the trim and paint was around $500. We were able to borrow friends’ miter saws, saw tables, nail guns, and TIME (most important - it’s not a quick project). We couldn’t have done it without help since this was very much our first trim rodeo. We would now be much faster at putting up, say, crown moulding in the living room (hint hint, Jackson).
Measure and Tape Everything.
A big part of this room was the measuring, re-measuring, and leveling of all the trim. The actual nailing-the-trim-to-the-wall part doesn’t take very long at all. Since we had the furniture first (which I highly recommend if you’re doing a more detailed pattern), we used the width of the bed frame to determine the size of the rectangles we wanted on either side of it and above it.

Start by measuring the width of each wall on which you want to put trim. We had a few things interrupting our walls like a closet, a window, and doors to the hallway and the master bath. What you’ll want to do is measure the un-interrupted space and split that up evenly by however many boxes you have. Don’t forget to account for the space you want to go between the boxes. We had 3” between each box here and made that match around the room. So, every box is also 3” above or below the chair rail and the crown moulding.
So if we had a wall that was 100”, we’d want to do 3 boxes that were 3” apart from each other and from the edges of the wall (so 5 segments of 3” spacing)
= 100-(3x5) = 85.
Divide that by 3 boxes = 28.33”
Each length for the bottom and top of the three boxes would be 28.33” long and then the vertical sides of the boxes would be however high up to the ceiling minus the 3” spacing at the top.
It sounds more complicated than it is, but it’s just complicated enough that you’ll want to check your measurements twice. It’s also tricky because everyone’s room is different, so no tutorial can effectively say “Just cut x inches of trim and staple it up and there you have it!” Scaling is a pain in the butt and it’s maybe the most important part of this project. We decided to use blue tape to measure and draw out all the boxes after we’d done the math but before we cut any trim. I highly recommend it.
Cut all your trim.

First, Jackson and our friend Alec put up the crown molding and the chair rail; this is the hardest part because its continuousness around the room requires pieces of trim to be coped.
Once all the picture frame trim was cut, it took us probably 2 hours to get it all onto the wall.
Paint it all.

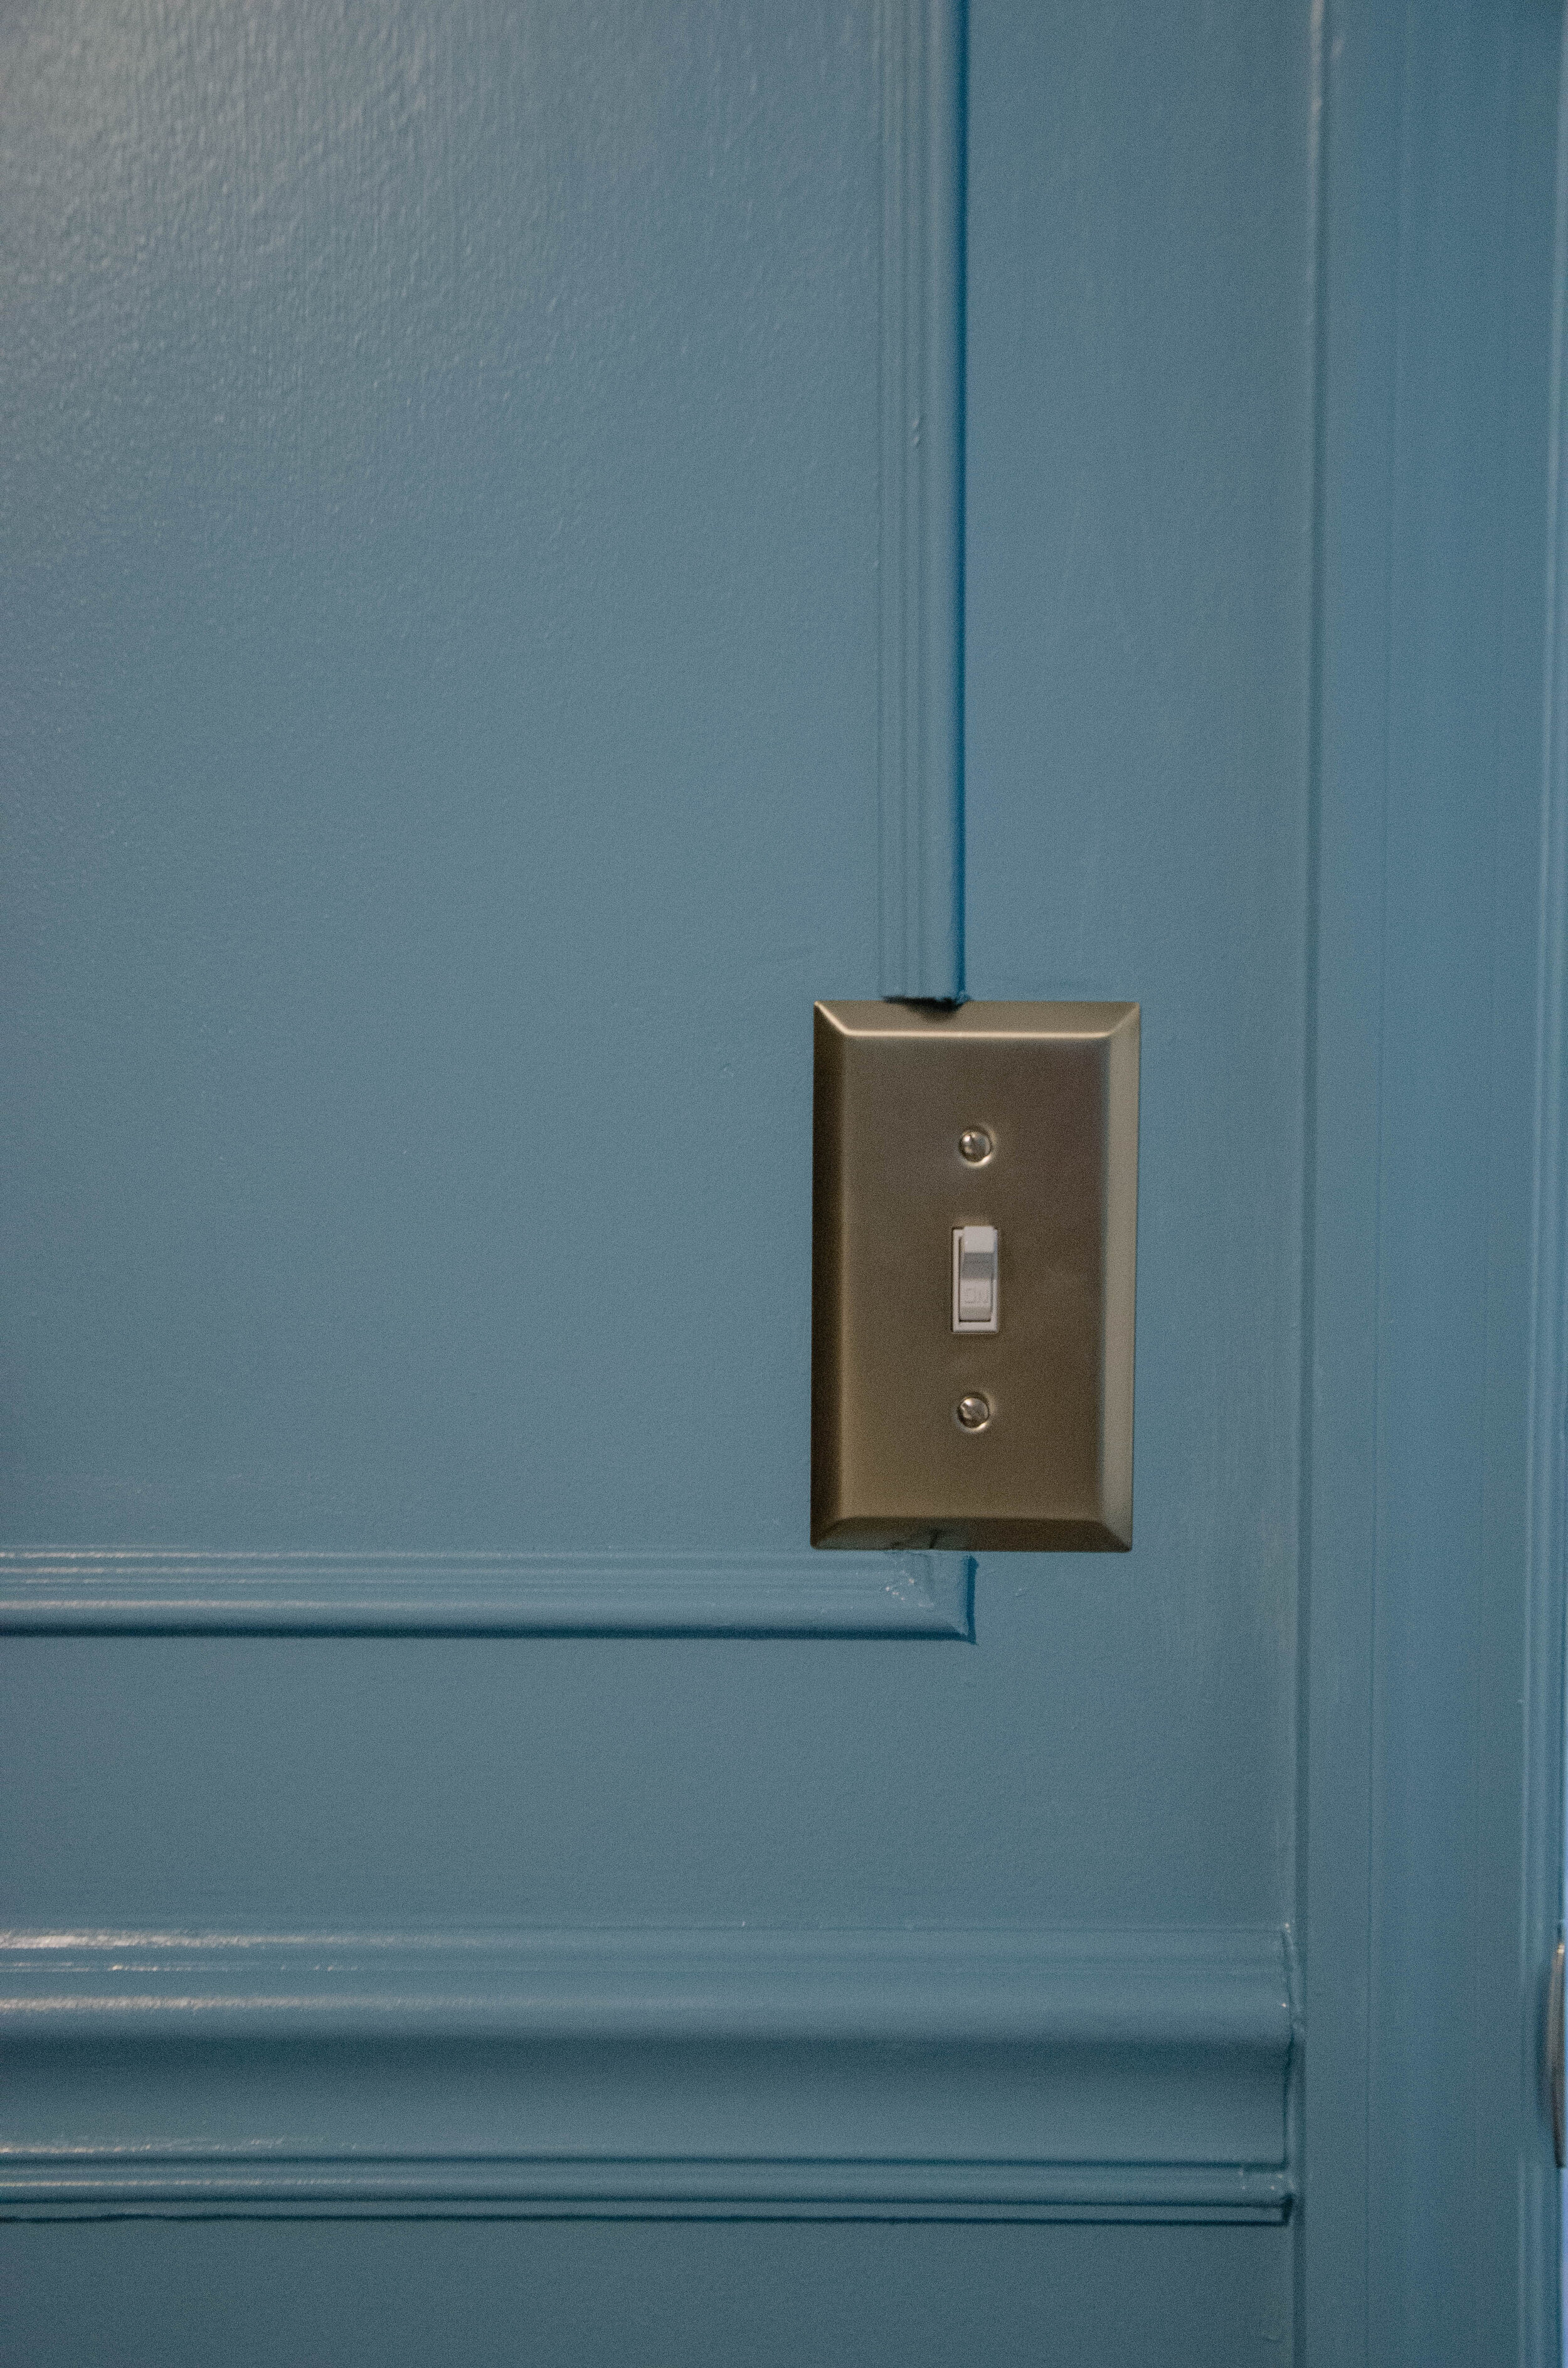
Once you’ve got all your trim on the wall, you’ll want to use wood filler to cover nail holes in the trim and to caulk all the seams where the trim meets the wall. I know this sounds tedious and that’s because it is. But it is worth it for the final look. You won’t want to be going back over your already painted wall to caulk and repaint down the road so just trust me on this one. It’s a little scary to start painting a whole room one color. We even painted the sides of the doors that faced in to the room so it’s like a cozy cave when the doors are shut.
THE FINAL RESULT
We. Love. It. It’s so lush and romantic. We feel like we sleep in a posh hotel room every night.


More on the details of our bedroom can be found in this blog post.
What do you think?! Would you put picture frame trim in your home?
xo,
em

Dining Room Wall
One day last September, my sister called me and said, “Hey, can I swing by? I have your Christmas gift. I know it’s early. It’s 300 lb. and I need help getting it out of my car.” WUT. Camille always ends up giving her gifts early —Christmas, birthday, all of it—and the hilarious part is she then still buys a gift for the actual holiday/event. Oh, Shamille! That part wasn’t a surprise.
But 300 lb.? The only question I asked before I said yes was “is it alive?” She responded that it wasn’t so I awaited my gigantic surprise. Low and behold, Camille pulls up with a full vintage brass piano plate tucked in her trunk with clean diapers from the seller’s home padding the sharper corners of the metal.
As much as I was thinking So you just gifted me a project, I was also thinking This thing is so cool and original and will go perfectly in our home. Talk about a unique piece of art! The plate dates to the 1880s-90s and it needed a LOT of cleaning before it could be considered art.
We got to work (Camille, mocking up a flat lay of the cleaning supplies because…Camille) and scrubbed the years away. We wanted to leave some patina, but not gunk or oil that could get on the wall or guests. The plan was to hang it up nearly against the accent wall in our (eventual) dining room.
We painted the wall first, a springy green. And, yes, it did take SIX PEOPLE to hang the plate from four very, very secured hooks in studs with liquid nails and airplane cable. It’s level (yay!) and adds such a unique texture to our home. Whatcha think?!
xo
em


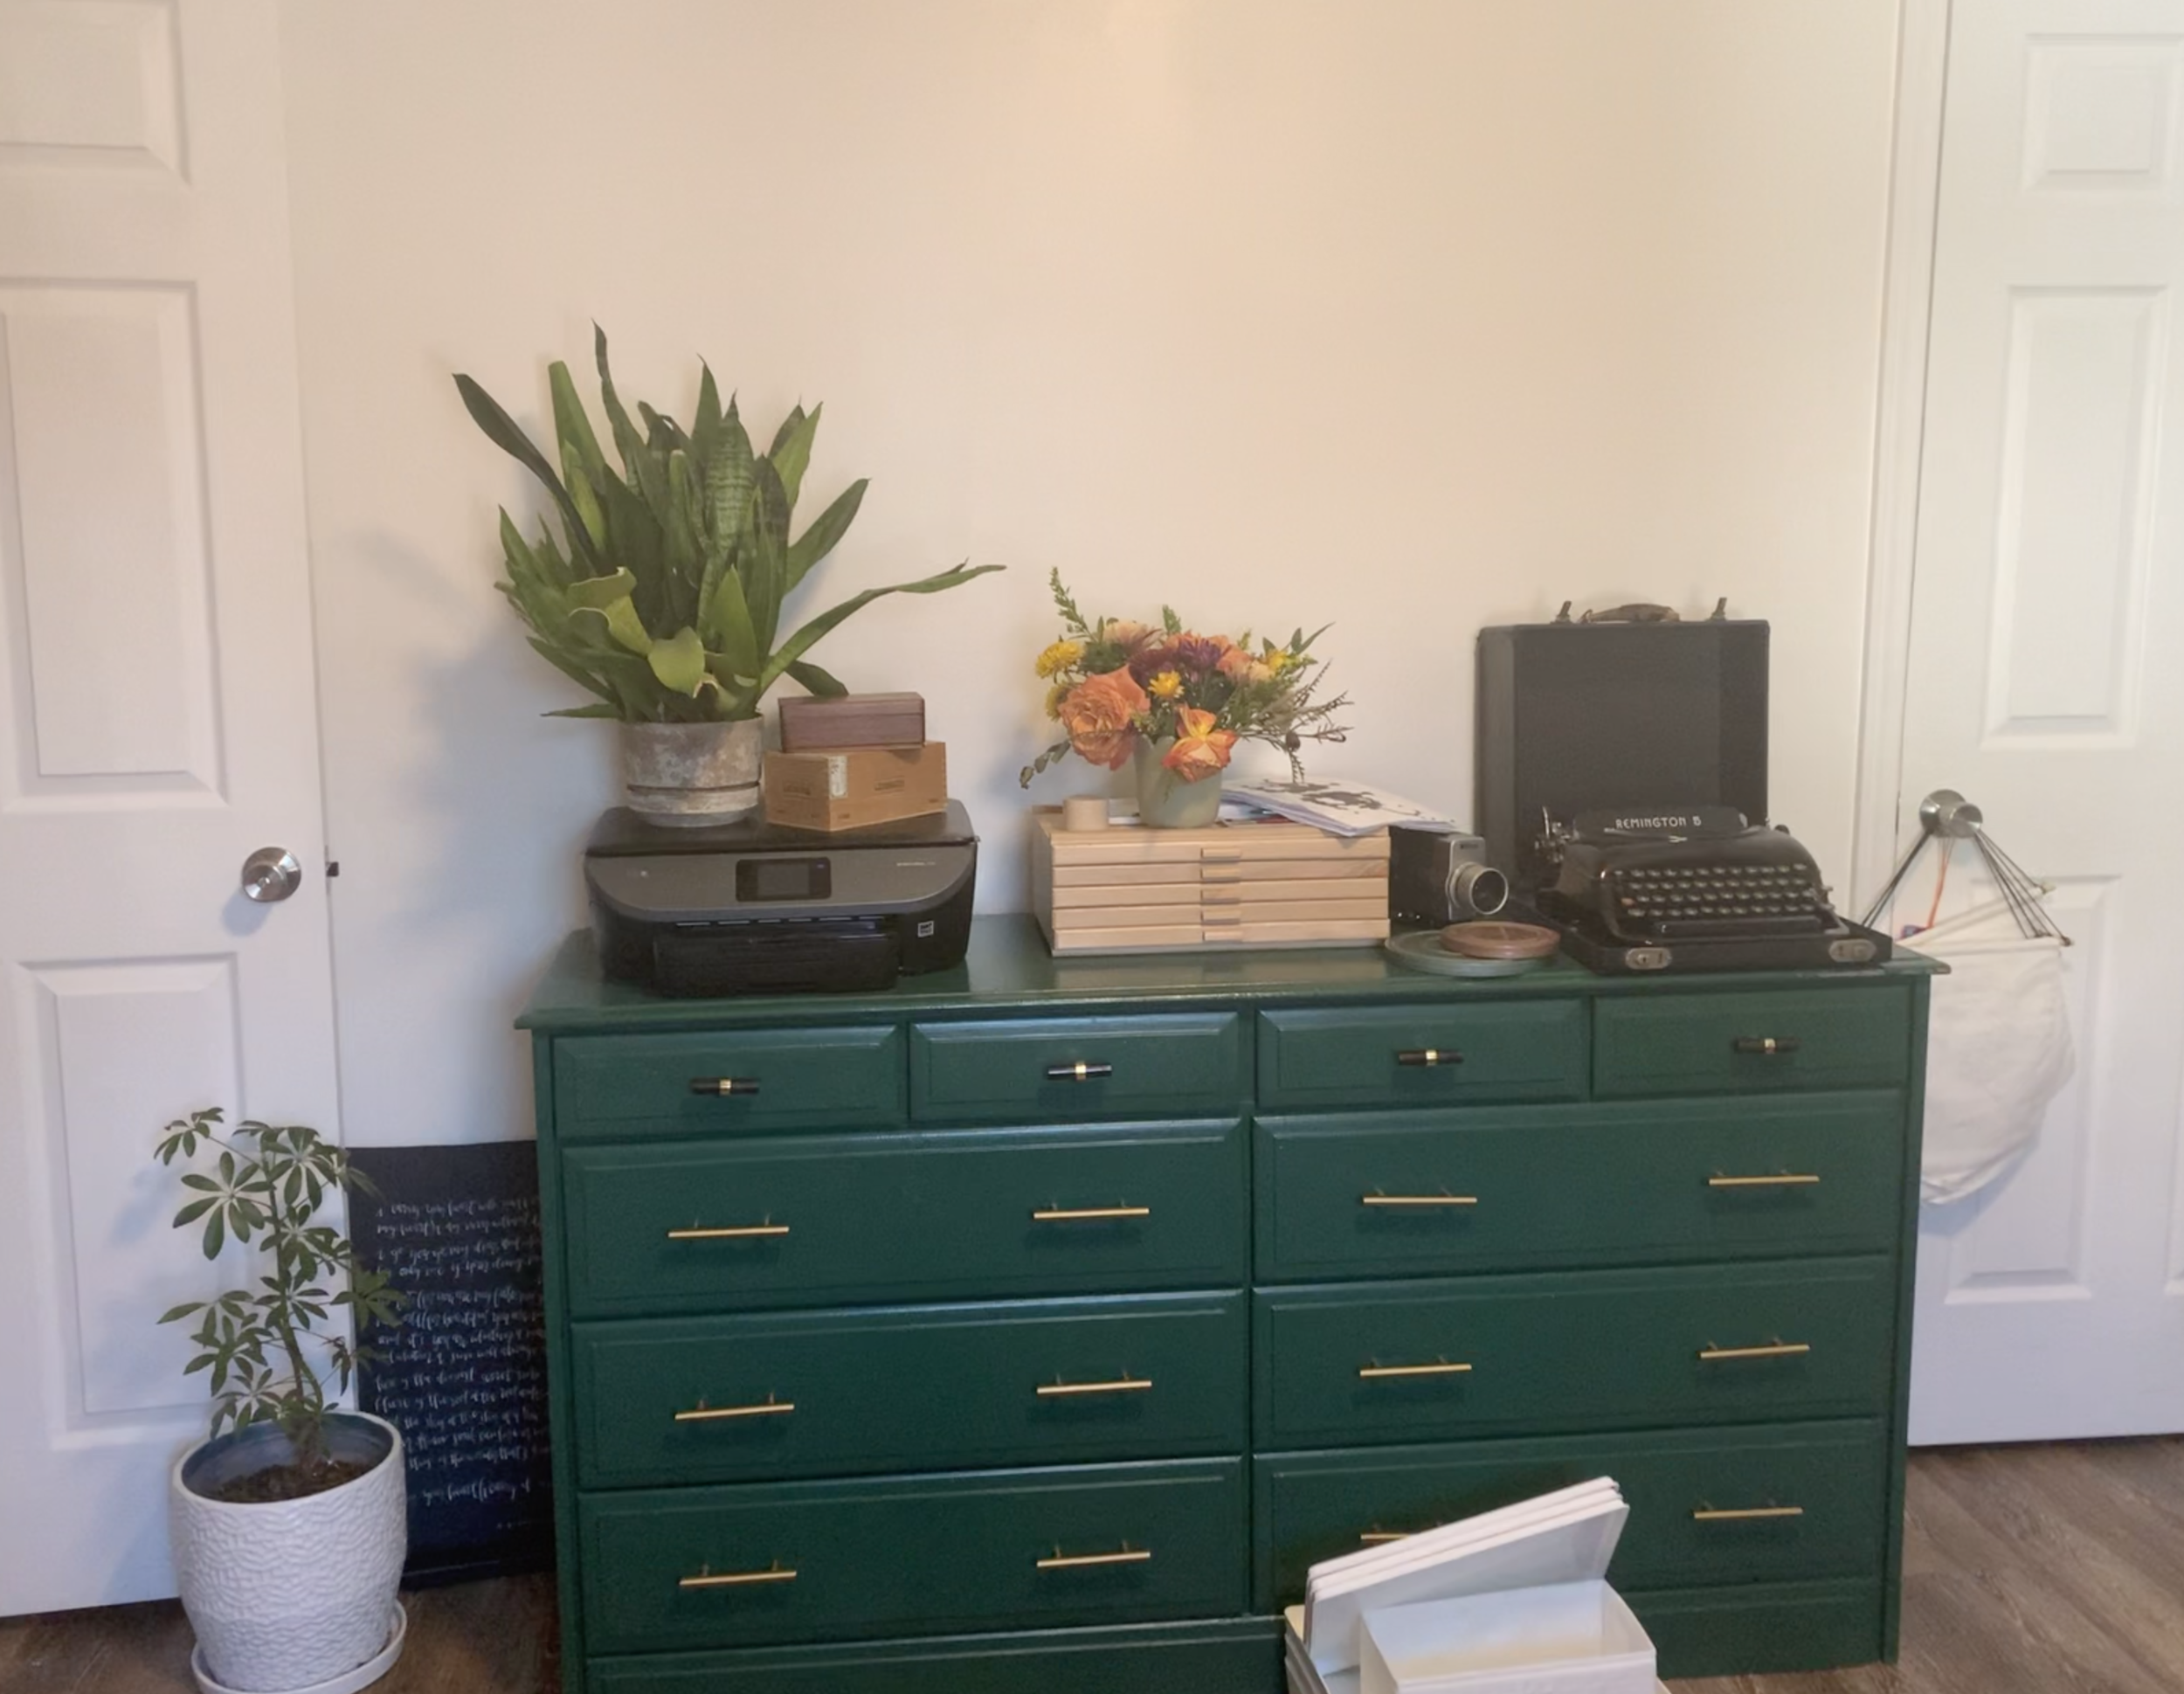
Office Floating Shelves
It’s been a minute since I’ve done a house update and wow have we been doing some house-updating! We decided like very sane and well-planned people to try to knock out three of our biggest projects in the two weeks before my family came to visit. Yep. One of them was this little office schmooze. We are always in need of shelf space for more books (this is where you pretend to be surprised) and I’d designed these floating shelves over our desks to solve that functional issue as well as have a little flair: they look like piano keys! Beveled and everything. I’m very happy with how they turned out and now I just need Camille to come over and style them for me. It’ll be a fresh challenge for her because these books are more like pantry staples: I’ll be using them and moving them around all the time as I’ve entered the writing phase (cue giant restaurant gong sound) of this Ph.D. journey.

Let’s be very clear: I may have designed the shelves and built the bases, which you can see Jackson installing onto the wall below, but I would not ever have been able to do this project on my own. Not even with two of me. I needed Jackson. These shelves are HEAVY. They’re built to last, cut from the last remaining two by fours we have from taking out the wall (the former fourth bedroom, which no one needs in a 1522 square foot home). I could barely hold them up to the wall. I certainly didn’t have the strength to press them flush to the wall, then grab a drill and push that at a 90 degree angle to the board. Yikes. In, yes, sadly classic Emma fashion, I got 60% of the way into this project and then had to grovel like a child who can’t reach the top shelf. Also, I cannot reach the top shelves in our home. Jackson graciously rescued me and did the massively effortful part of getting these up… then decided he really wanted to see it all the way through and enjoyed using the cute little clamps and the wood glue and the nail gun and voila! We had some finished floating shelves.


We moved a few things around in this room and as you can tell, these iPhone photos are on par quality wise for how finished this room is. HD pics headed your way when the new desks, zebra rug, and roarschach prints are all in place.
What'cha think?
em

Our Painted “Wallpaper” Bathroom
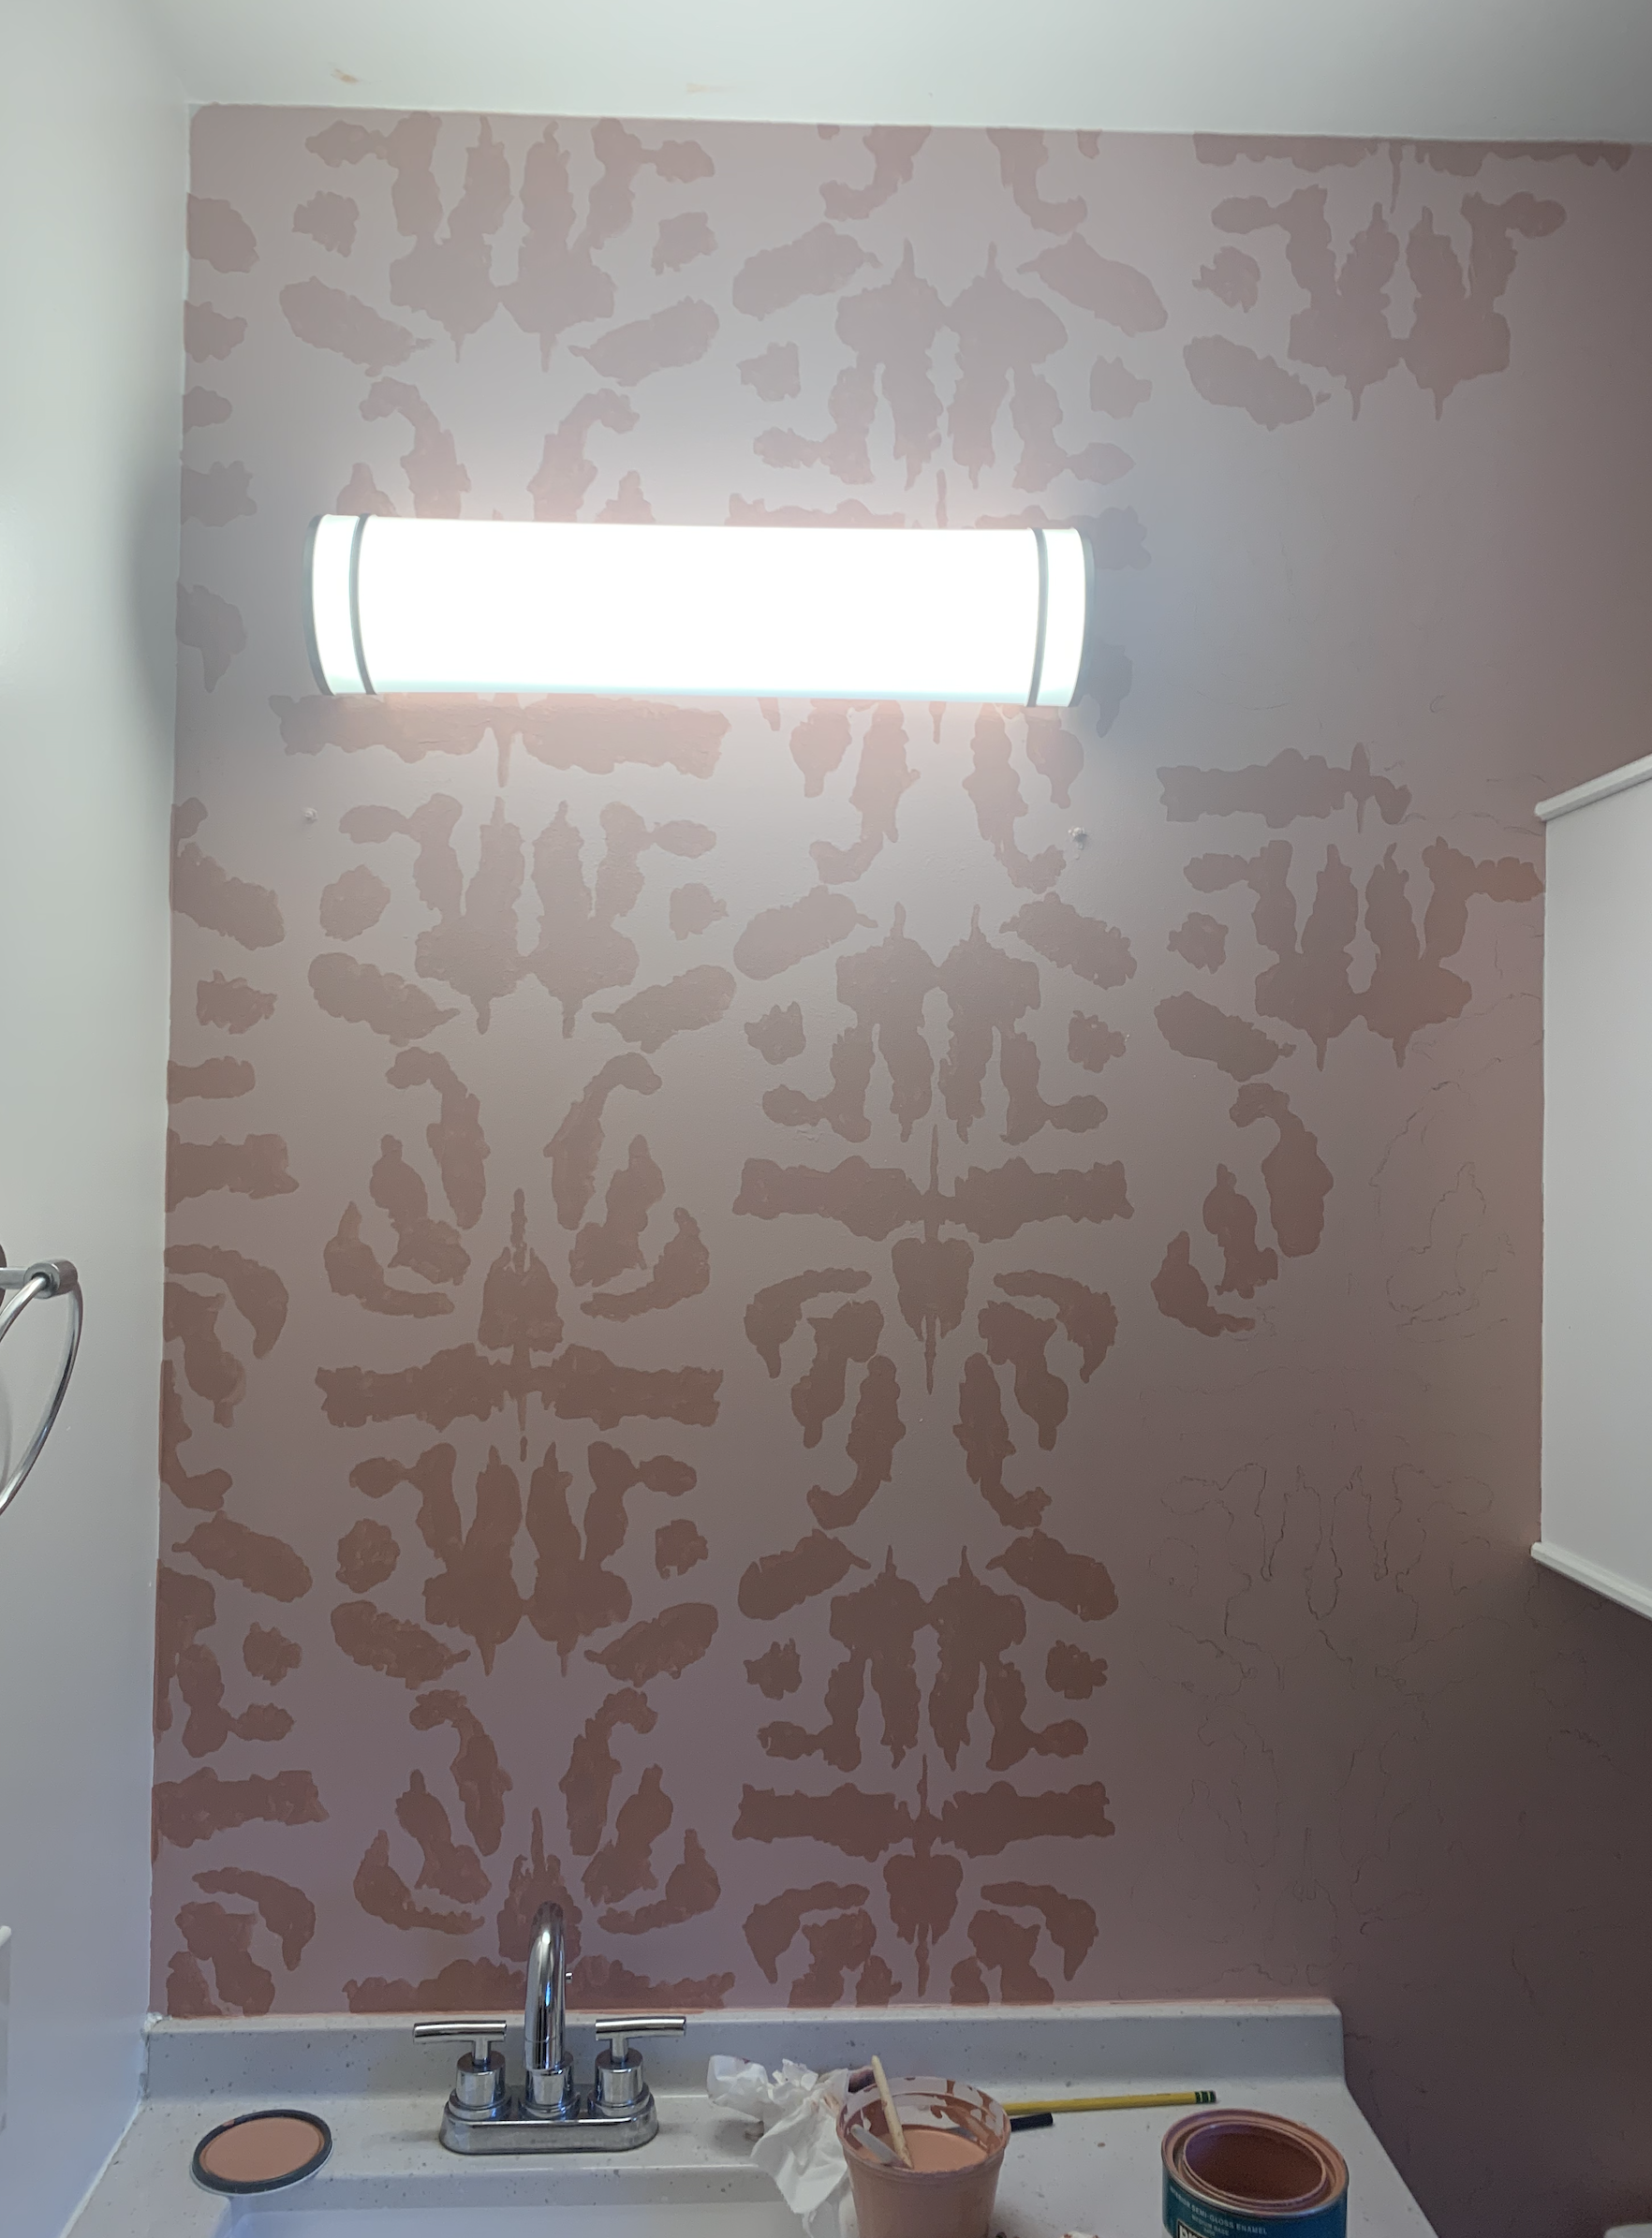
The process of updating our bathroom (which started as a clean and new but very, very blank slate) started with imagining some kind of fun contrast on the main wall.


The process of updating our bathroom (which started as a clean and new but very, very blank slate) started with imagining some kind of fun contrast on the main wall. I fell in love with some spectacular wallpaper before realizing what an expense and ordeal adding wallpaper to a home could be. Once I read a little more, I floated an idea to Jackson (ya know, the other person who lives here) and Camille (the person I would ask to do me a major design favor): what if we painted wallpaper onto the wall instead of actually wallpapering the bathroom?
Fortunately, they both said yes and we began to explore designs. I wanted something organic feeling. The wallpaper I liked had a kind of feather or scale vibe to it. I liked that, but we couldn’t settle on a pattern that was a good balance of organized and loose. So we kept thinking.
I wanted to in some way match the colors of this beautiful Japanese woodblock print from the 1940s that my Grampa gifted me. We settled on contrasting dusty pinks to give a femme yet sophisticated feel to the guest bath.
Soon enough, Camille came to me with the absolutely brilliant idea of making some rorschach prints, scanning those, and devising a pattern thereafter. She thought it was a good way to get the organic shapes with some structure since the rorschachs would be in identical halves and we would digitize them and clean them up. We took some pretty pain-staking efforts to get them just right.
They’re available for purchase as digital prints in the shop! And yes, they all have fun names based on what I read into them.


After all the prints were dry, we scanned them at high resolution (1200 dpi) and I began digitally cleaning them. Once all 22 of them were tidied, I started manipulating the rorschachs into patterns and eventually adding colors.
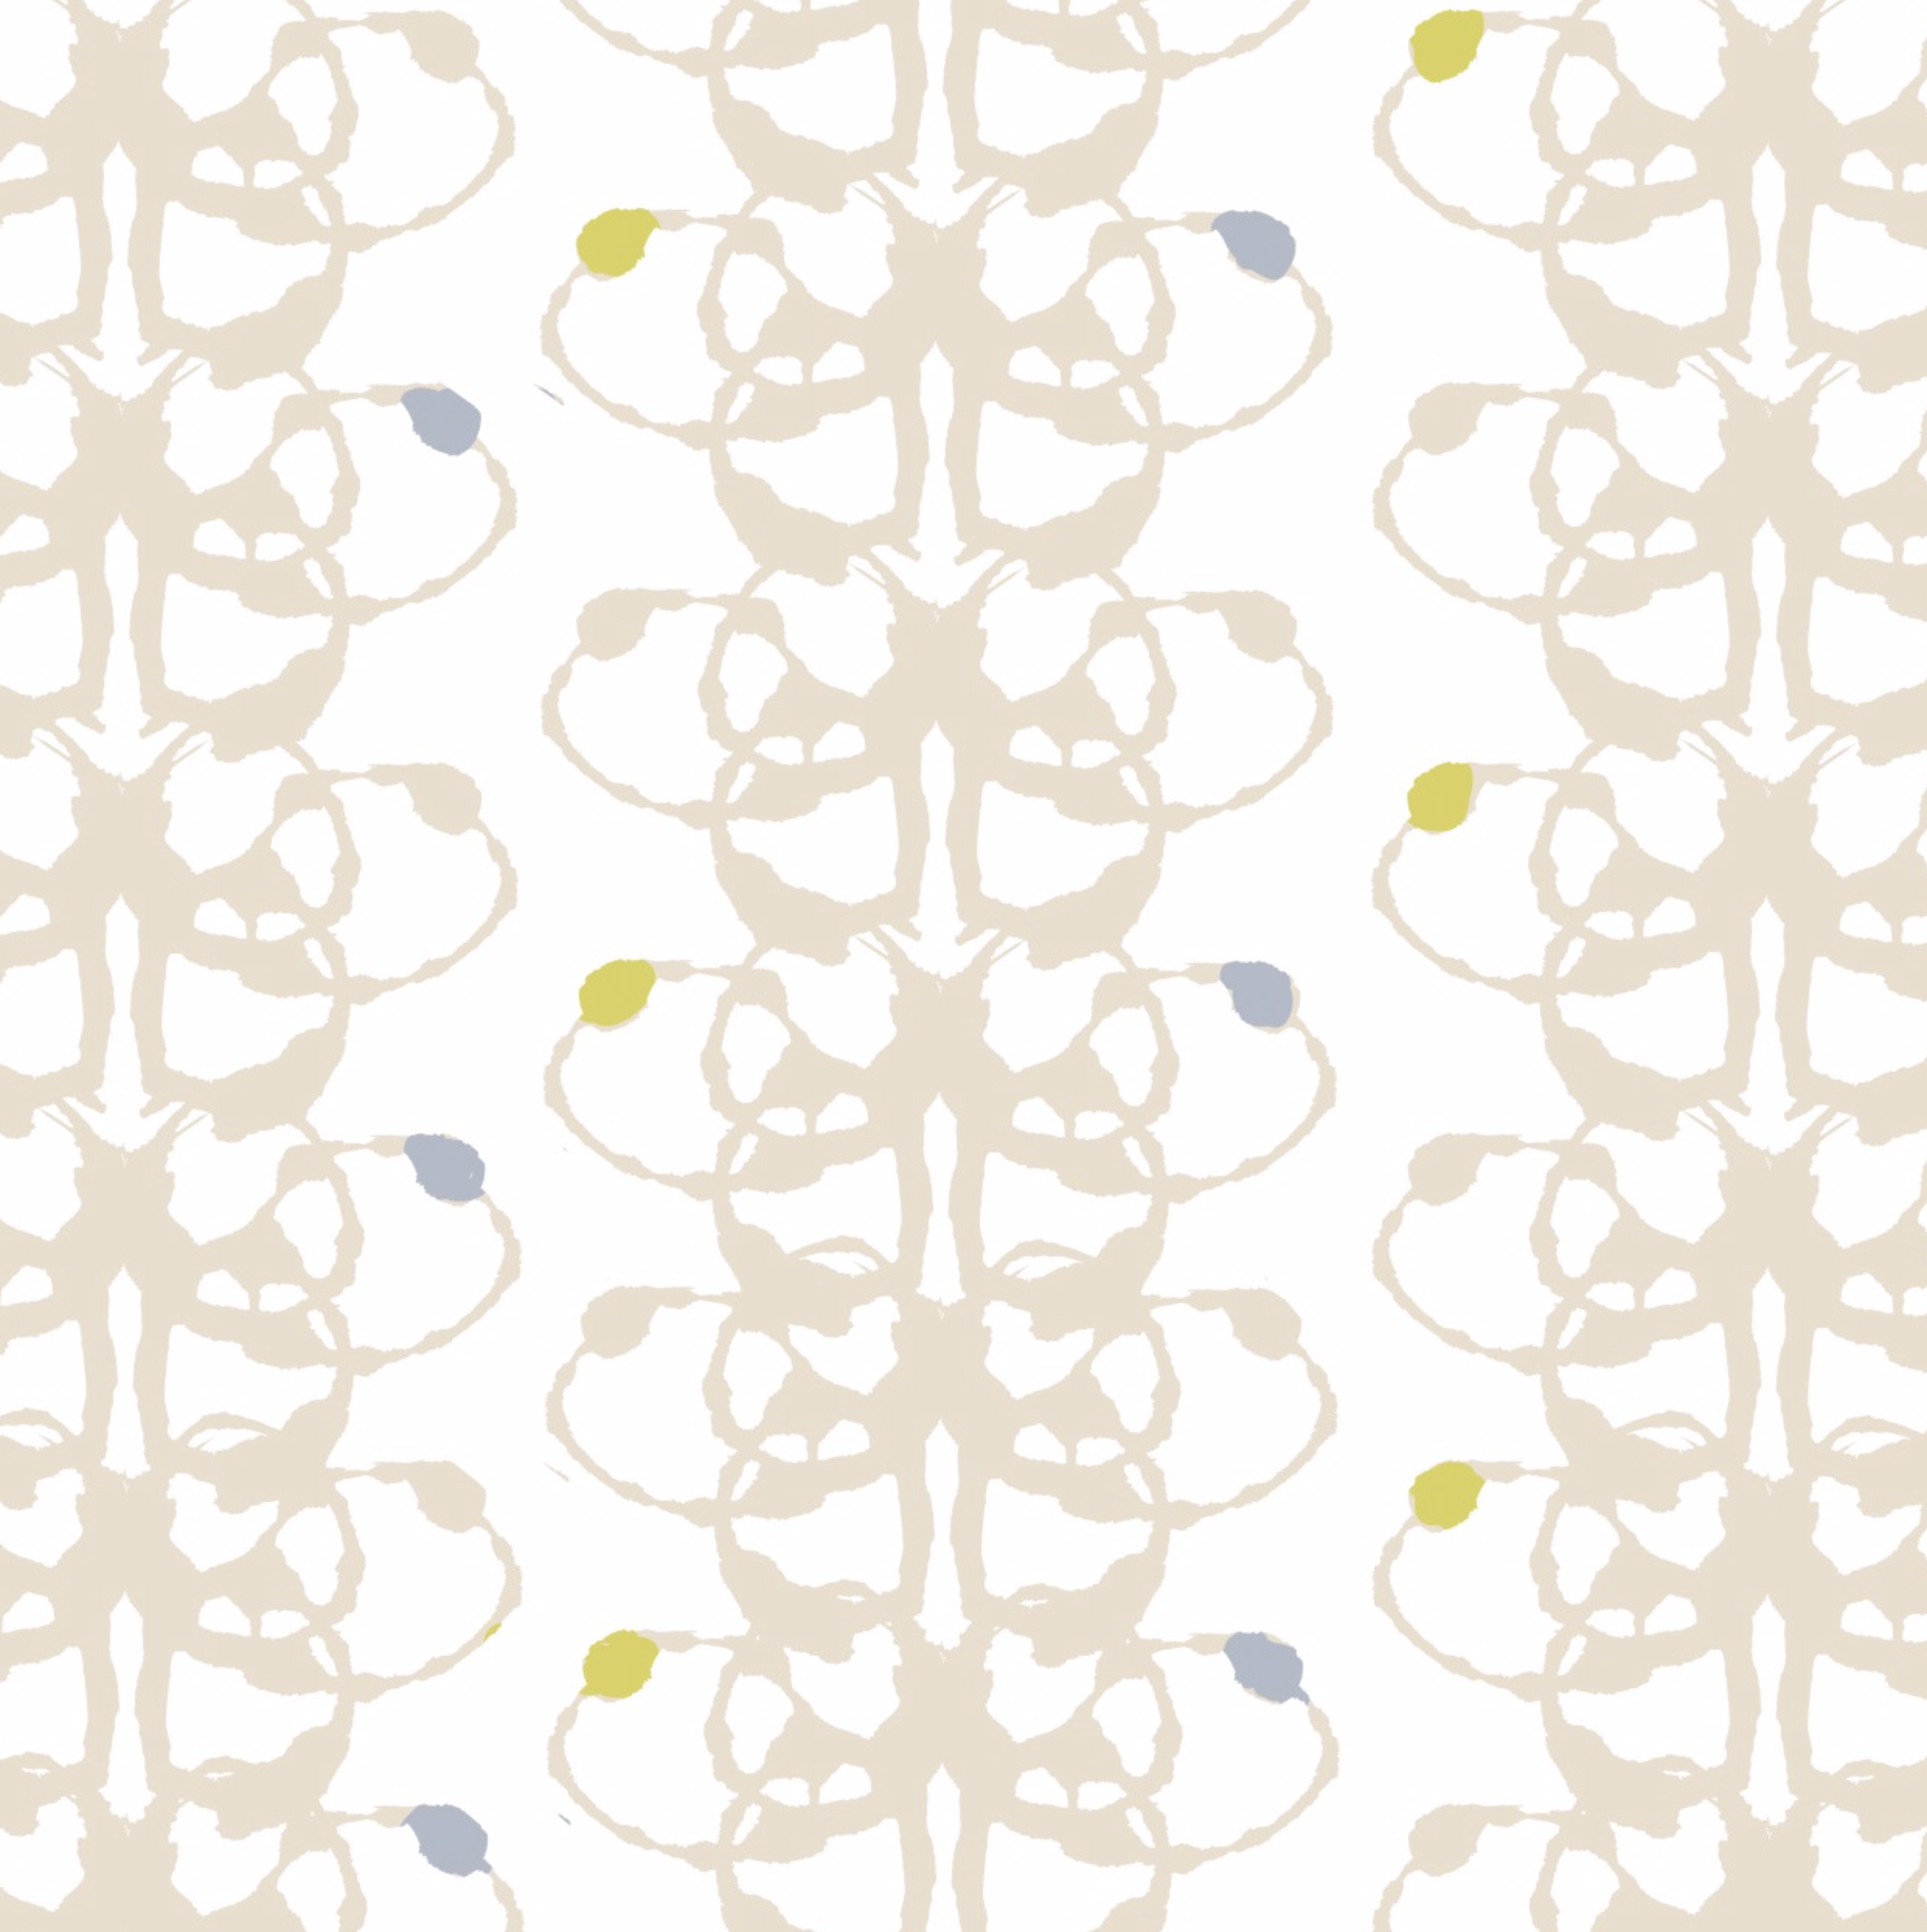
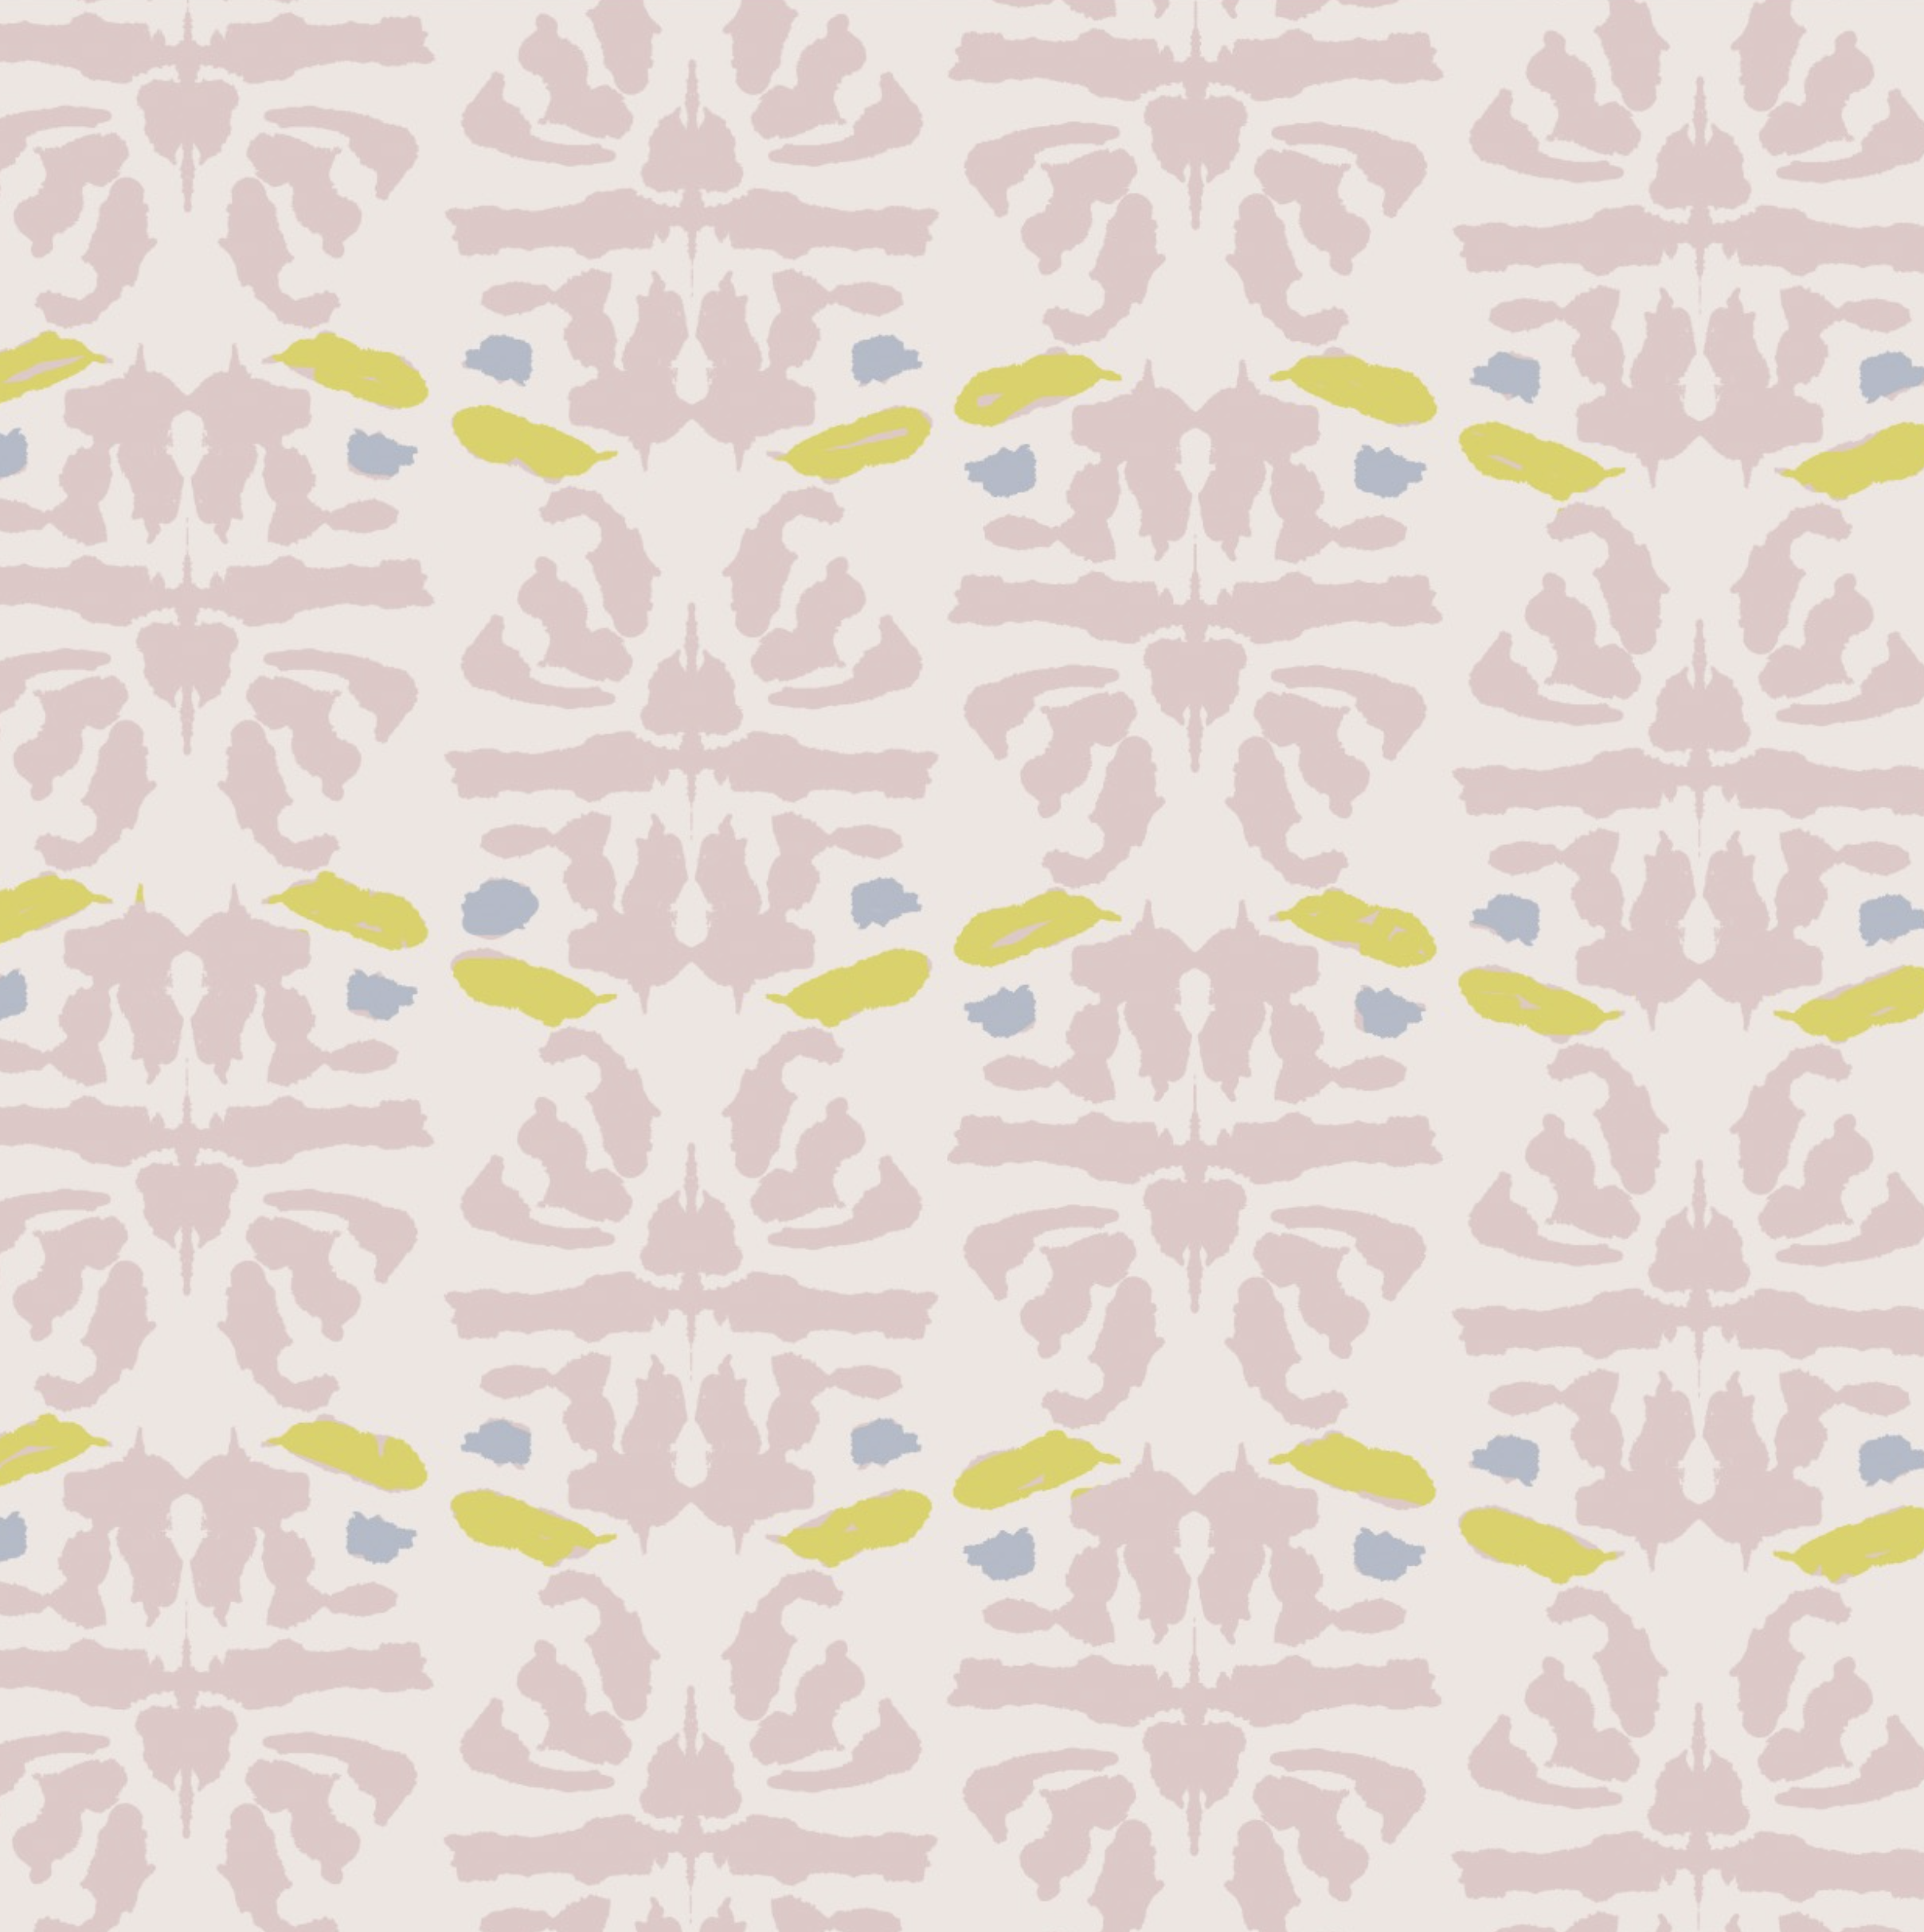
A lot of trial and error led us to a simplified pattern of a single rorschach. No doubt we’ll be producing patterns with them in the future…for, say, some custom “wallpaper” painting templates and wrapping paper perhaps? ;)
We painted the whole wall the lighter dusty quartz color and then got out a $60 projector and some 5 gallon containers on which to gradually stack it. We drew all of the patterns carefully onto the wall in pencil (which you can erase easily later) and began the process of painting.


And so we were off to the (painting) races! Believe it or not, we used some cheapo IKEA brushes to do all the detail work. I loved how the end result included more texture and variability than wallpaper would have.
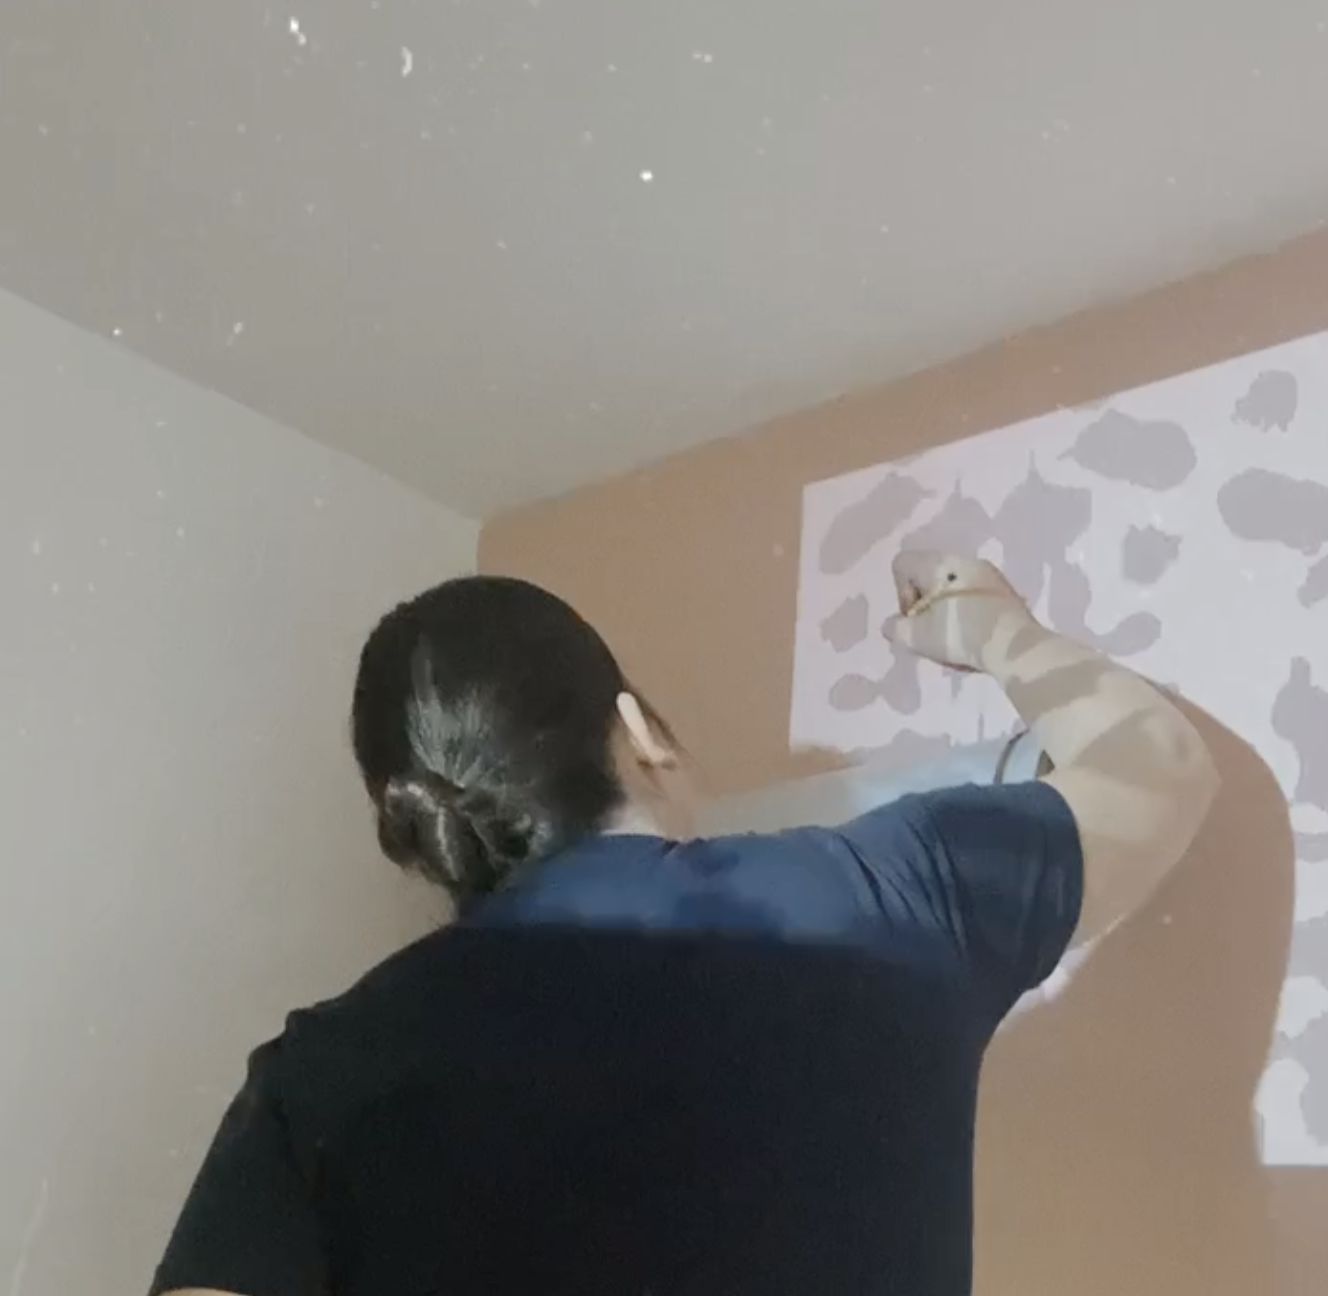

I know all the images are of Camille but I promise I didn’t make her do all the work. We had a great time painting together, listening to music, and drinking some beer.

In true bathroom fashion, we celebrated by brushing our teeth (as Camille is doing here). That fabulous towel is vintage. Isn’t it awesome?
Would you ever paint your “wallpaper”? Let me know what you think of the room!
xo
em
Our Paris Meets Midcentury Modern Bedroom
[image: my bedroom, which has blue walls with picture frame trim, a plant, a large low bed with white bedding on which my dog is sitting]
Start with the furniture.
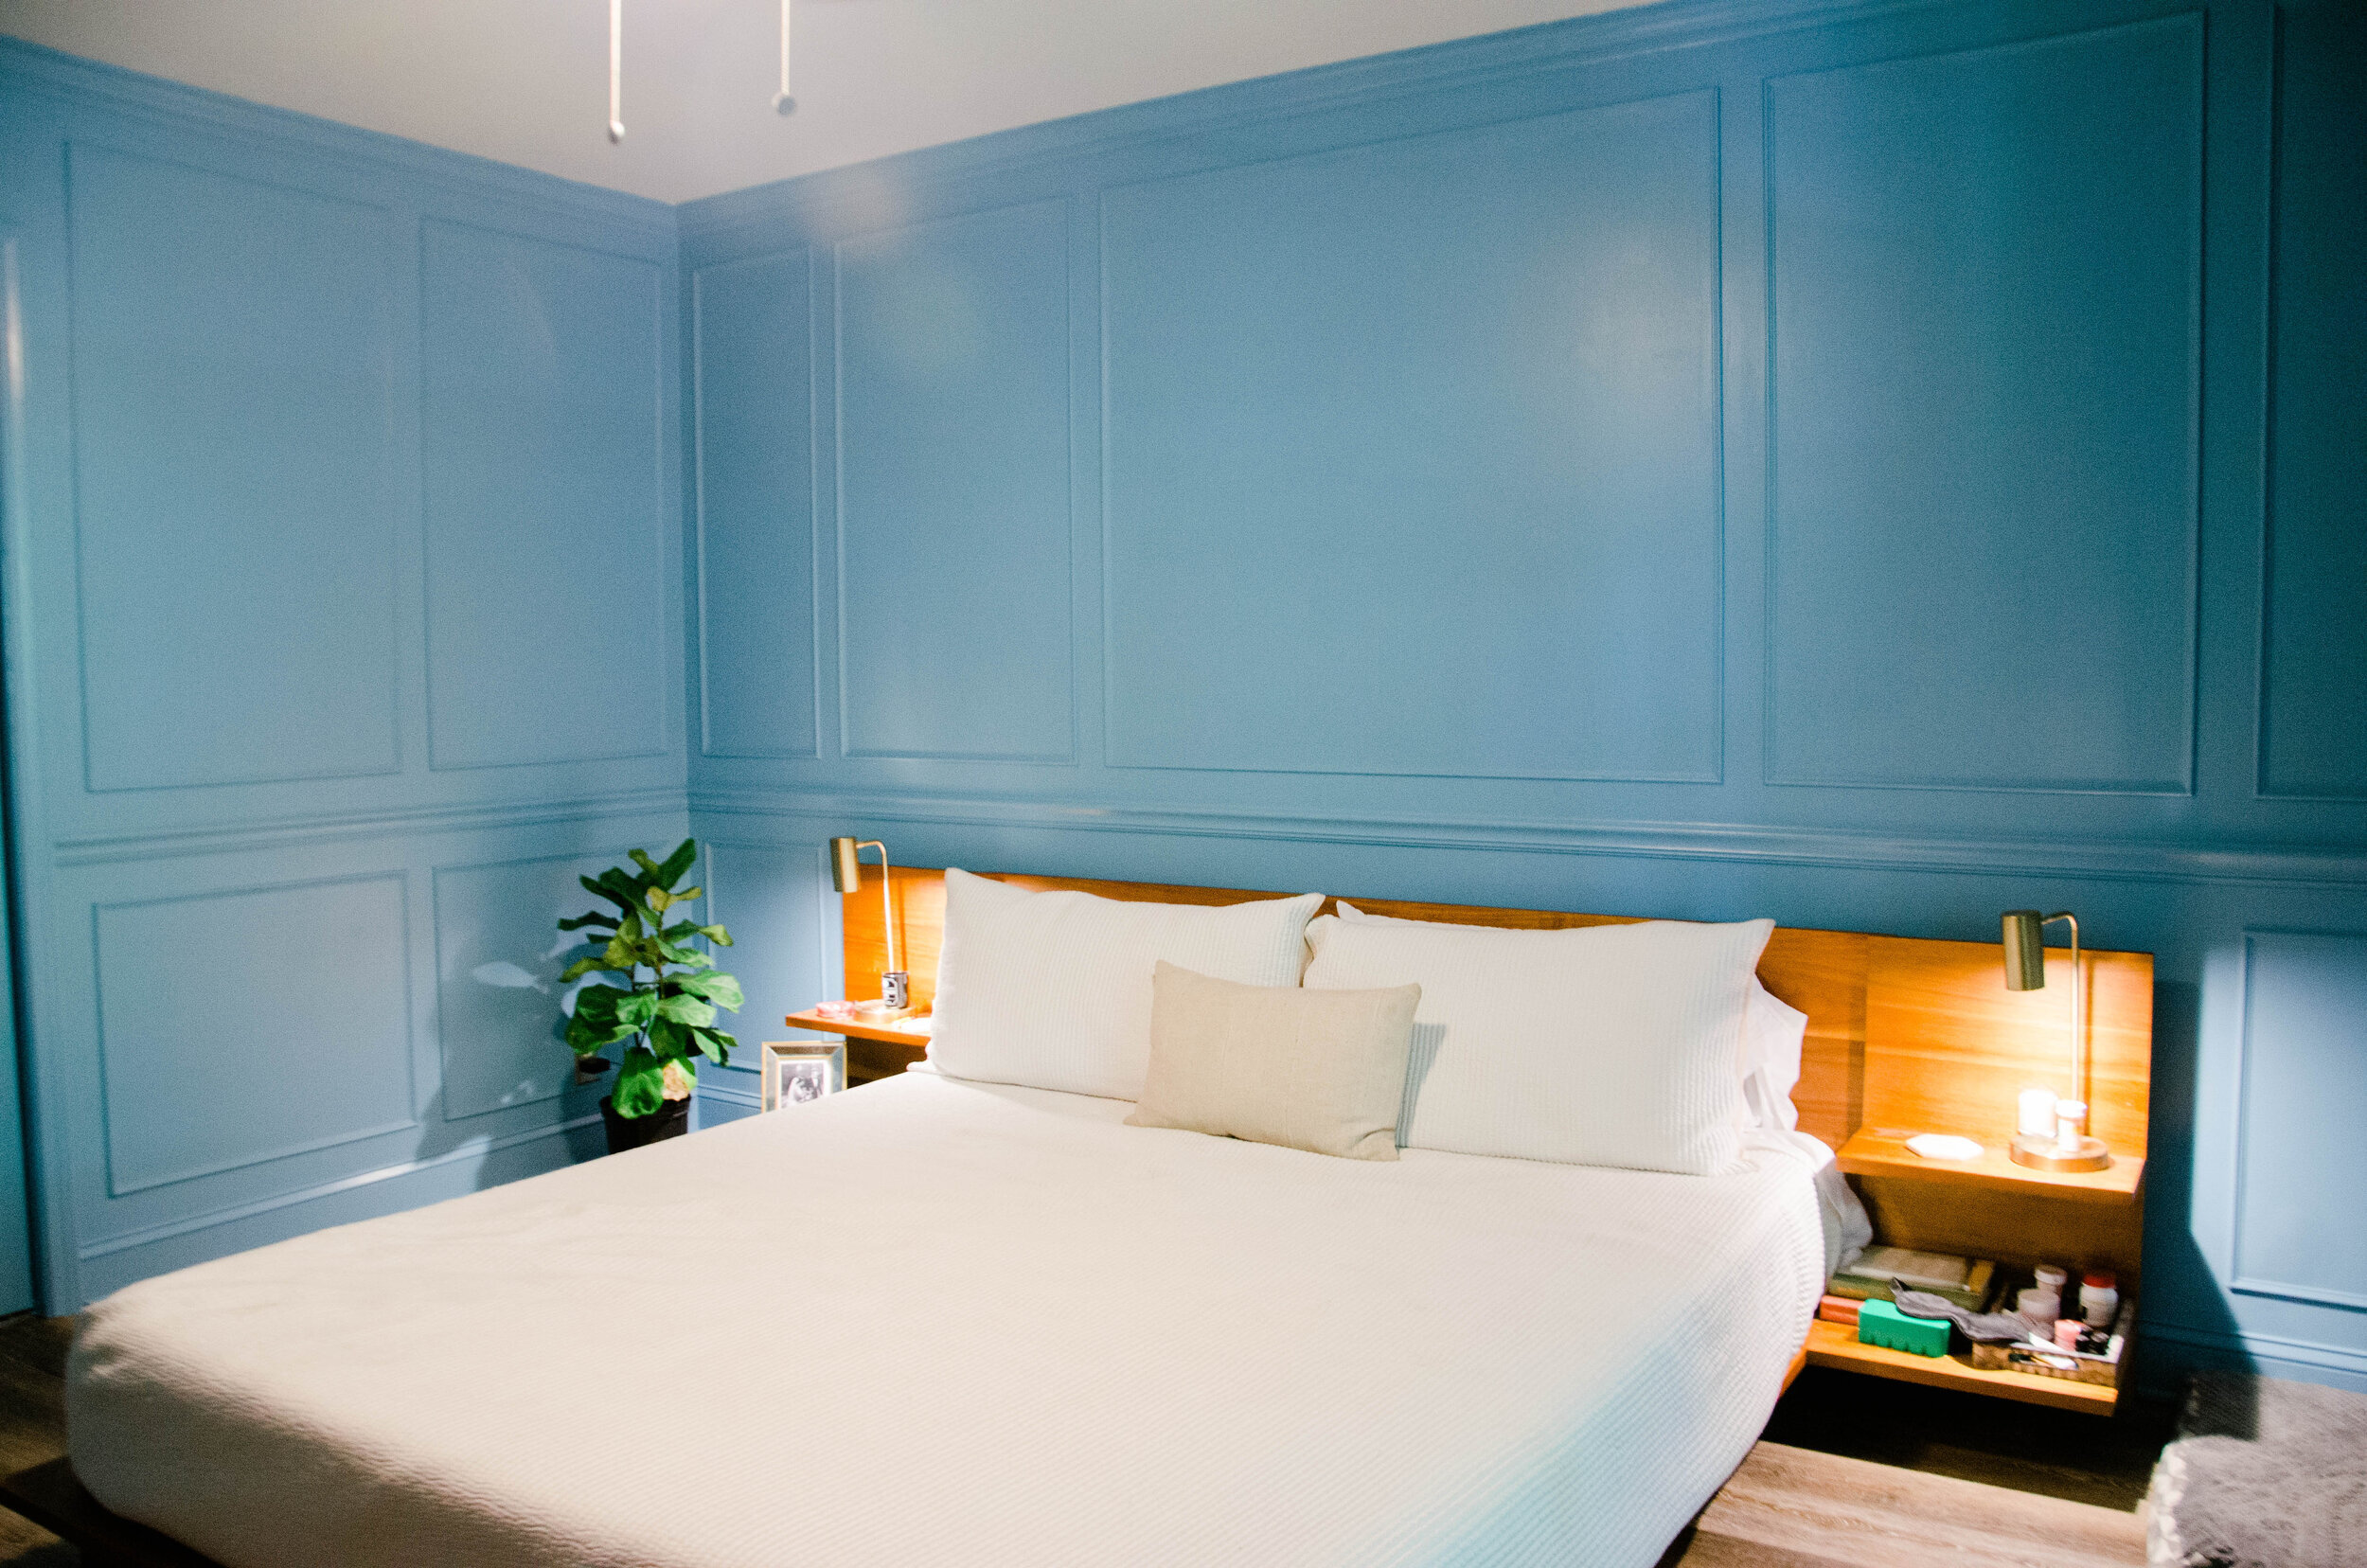
When we bought our home, we knew we’d want to upgrade to a king size bed. Jackson is 6’3” and has always had his feet dangling off the edge of the bed, so we both went big and went home and splurged on the California king. This size choice did limit our options in terms of frames and mattresses a bit, but we love what we found! We ended up with a Tuft and Needle mattress on top of our low profile Andes Acacia bed from CB2. We are obsessed with the bed frame. Plus it incorporates nightstands into its headboard, meaning we were able to roll in our budget for nightstands to get the bed frame we really wanted.
Know your style.
We describe our shared style as midcentury modern with a coastal California vibe and some serious color (we especially love gem tones). My sister once described our style as Mad Men but set in Cuba. Last year, though, we spent a month traveling all through France and Belgium and stayed in some really lovely homes and hotels. We wanted to incorporate some of the finer grain details that French and Belgian architecture and design taught us. Enter: picture frame trim.
Before we get into what we actually did, here are some of the images that inspired our bedroom.
![[image: A screenshot of my Pinterest board that inspired my bedroom]](https://images.squarespace-cdn.com/content/v1/5fac2dd6ecebbe4cd2cf7f94/1607037897042-AHJRLUNPK6WD3ZPNQJLD/A+screenshot+of+my+Pinterest+board+that+inspired+my+bedroom)
[image: A screenshot of my Pinterest board that inspired my bedroom]
There are many different ways to upgrade a flat wall with some exciting trim work. My childhood bedroom had a double chair rail, for instance. And we considered doing some board-and-batten paneling in a guest room at one point. (Guest room design is up next; stay tuned).
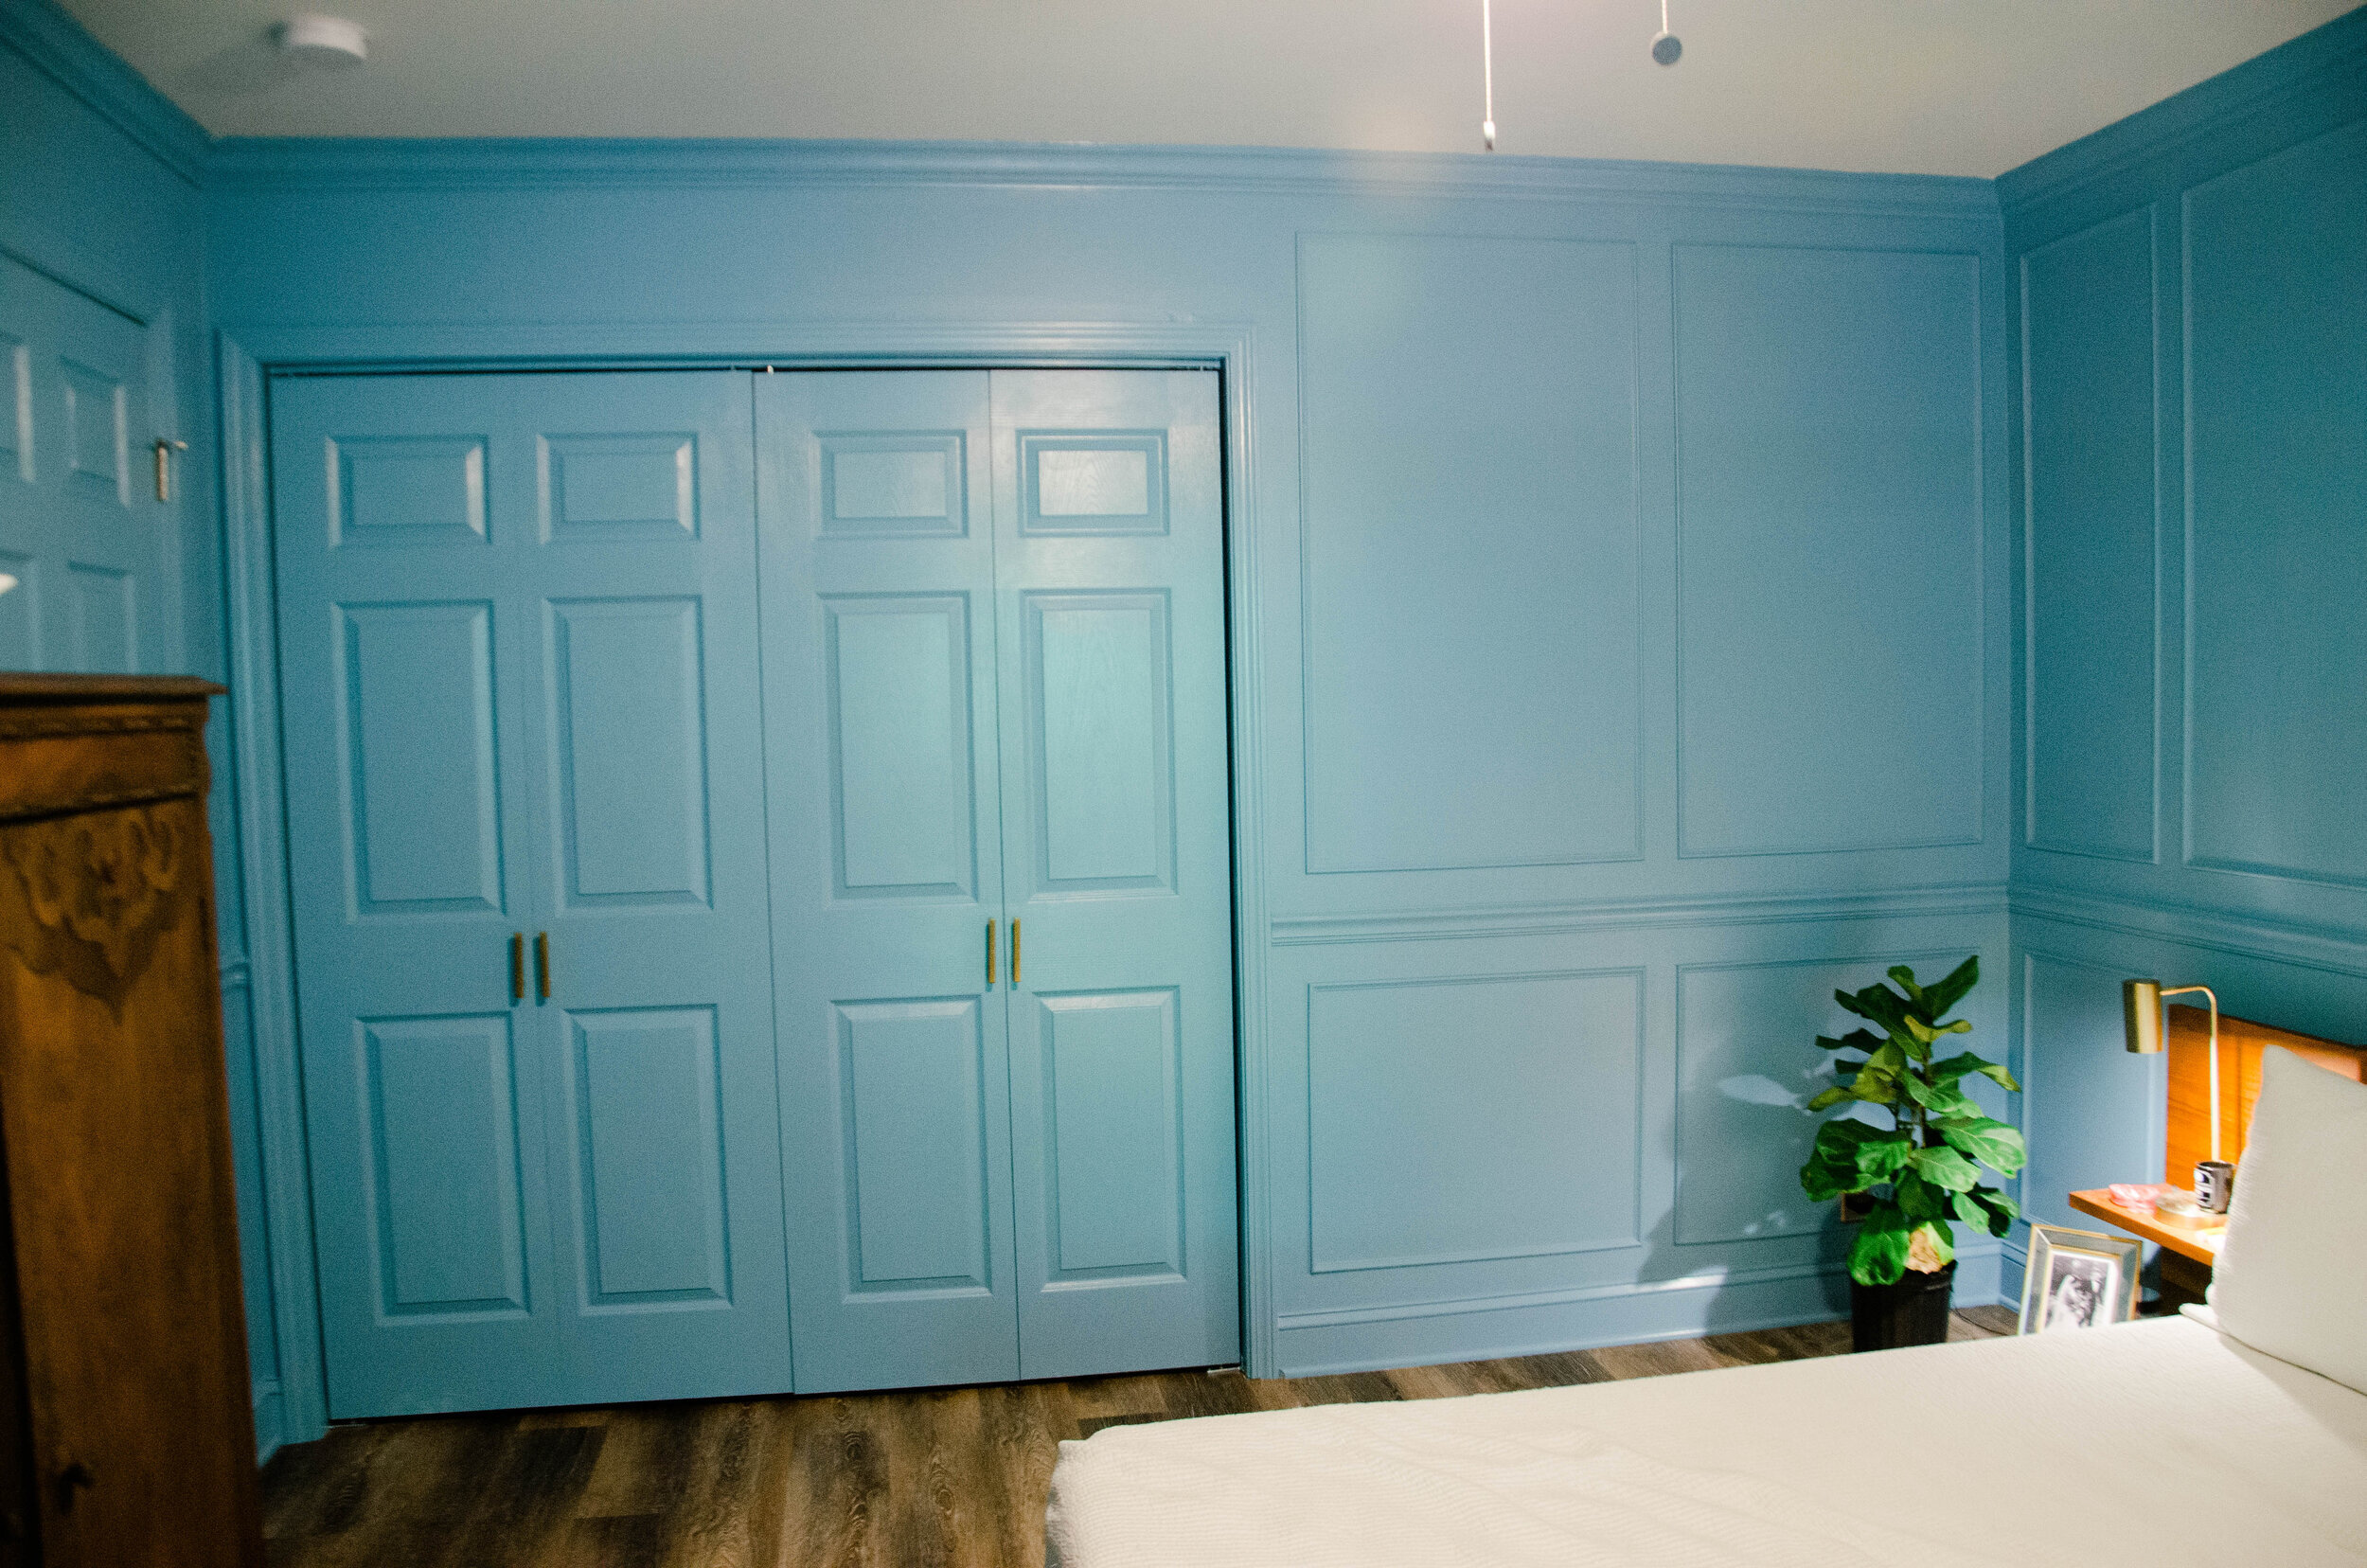
After looking around for a bit, we decided to go for some more ornate trim work but stick with a single color for walls and trim. It felt like a pretty bold move. I think a lot of our friends thought we were a little looney when we kept describing “so all this is going to be one color: walls, doors, trim, everything you see” BUT here we are and we love it.
BEFORE
This image is from the listing of the home before we bought it.
[image: a room staged with white and orange furniture and beige walls]
AFTER
Surprisingly, the trim and large bed make the room feel much bigger than before.
[image: the same as the first image on this web page]
This master bedroom from Alisa at A Glass of Bovino was probably the most helpful walk-through from scratch to final product on the trim. Reading her post also showed us just how impactful a bit of trim could be. All in, the trim and paint was around $500. We were able to borrow friends’ miter saws, saw tables, nail guns, and TIME (most important - it’s not a quick project). We couldn’t have done it without help since this was very much our first trim rodeo. We would now be much faster at putting up, say, crown moulding in the living room (hint hint, Jackson).
HOW TO ADD CUSTOM PICTURE FRAME TRIM
Measure and Tape Everything.
A big part of this room was the measuring, re-measuring, and leveling of all the trim. The actual nailing-the-trim-to-the-wall part doesn’t take very long at all. Since we had the furniture first (which I highly recommend if you’re doing a more detailed pattern), we used the width of the bed frame to determine the size of the rectangles we wanted on either side of it and above it.
Start by measuring the width of each wall on which you want to put trim. We had a few things interrupting our walls like a closet, a window, and doors to the hallway and the master bath. What you’ll want to do is measure the un-interrupted space and split that up evenly by however many boxes you have. Don’t forget to account for the space you want to go between the boxes. We had 3” between each box here and made that match around the room. So, every box is also 3” above or below the chair rail and the crown moulding.
So if we had a wall that was 100”, we’d want to do 3 boxes that were 3” apart from each other and from the edges of the wall (so 5 segments of 3” spacing)
= 100-(3x5) = 85.
Divide that by 3 boxes = 28.33”
Each length for the bottom and top of the three boxes would be 28.33” long and then the vertical sides of the boxes would be however high up to the ceiling minus the 3” spacing at the top.
It sounds more complicated than it is, but it’s just complicated enough that you’ll want to check your measurements twice. It’s also tricky because everyone’s room is different, so no tutorial can effectively say “Just cut x inches of trim and staple it up and there you have it!” Scaling is a pain in the butt and it’s maybe the most important part of this project. We decided to use blue tape to measure and draw out all the boxes after we’d done the math but before we cut any trim. I highly recommend it.
Cut all your trim.
First, Jackson and our friend Alec put up the crown molding and the chair rail; this is the hardest part because its continuousness around the room requires pieces of trim to be coped.
Once all the picture frame trim was cut, it took us probably 2 hours to get it all onto the wall.
Paint it all.
Once you’ve got all your trim on the wall, you’ll want to use wood filler to cover nail holes in the trim and to caulk all the seams where the trim meets the wall. I know this sounds tedious and that’s because it is. But it is worth it for the final look. You won’t want to be going back over your already painted wall to caulk and repaint down the road so just trust me on this one. It’s a little scary to start painting a whole room one color. We even painted the sides of the doors that faced in to the room so it’s like a cozy cave when the doors are shut.
THE FINAL RESULT
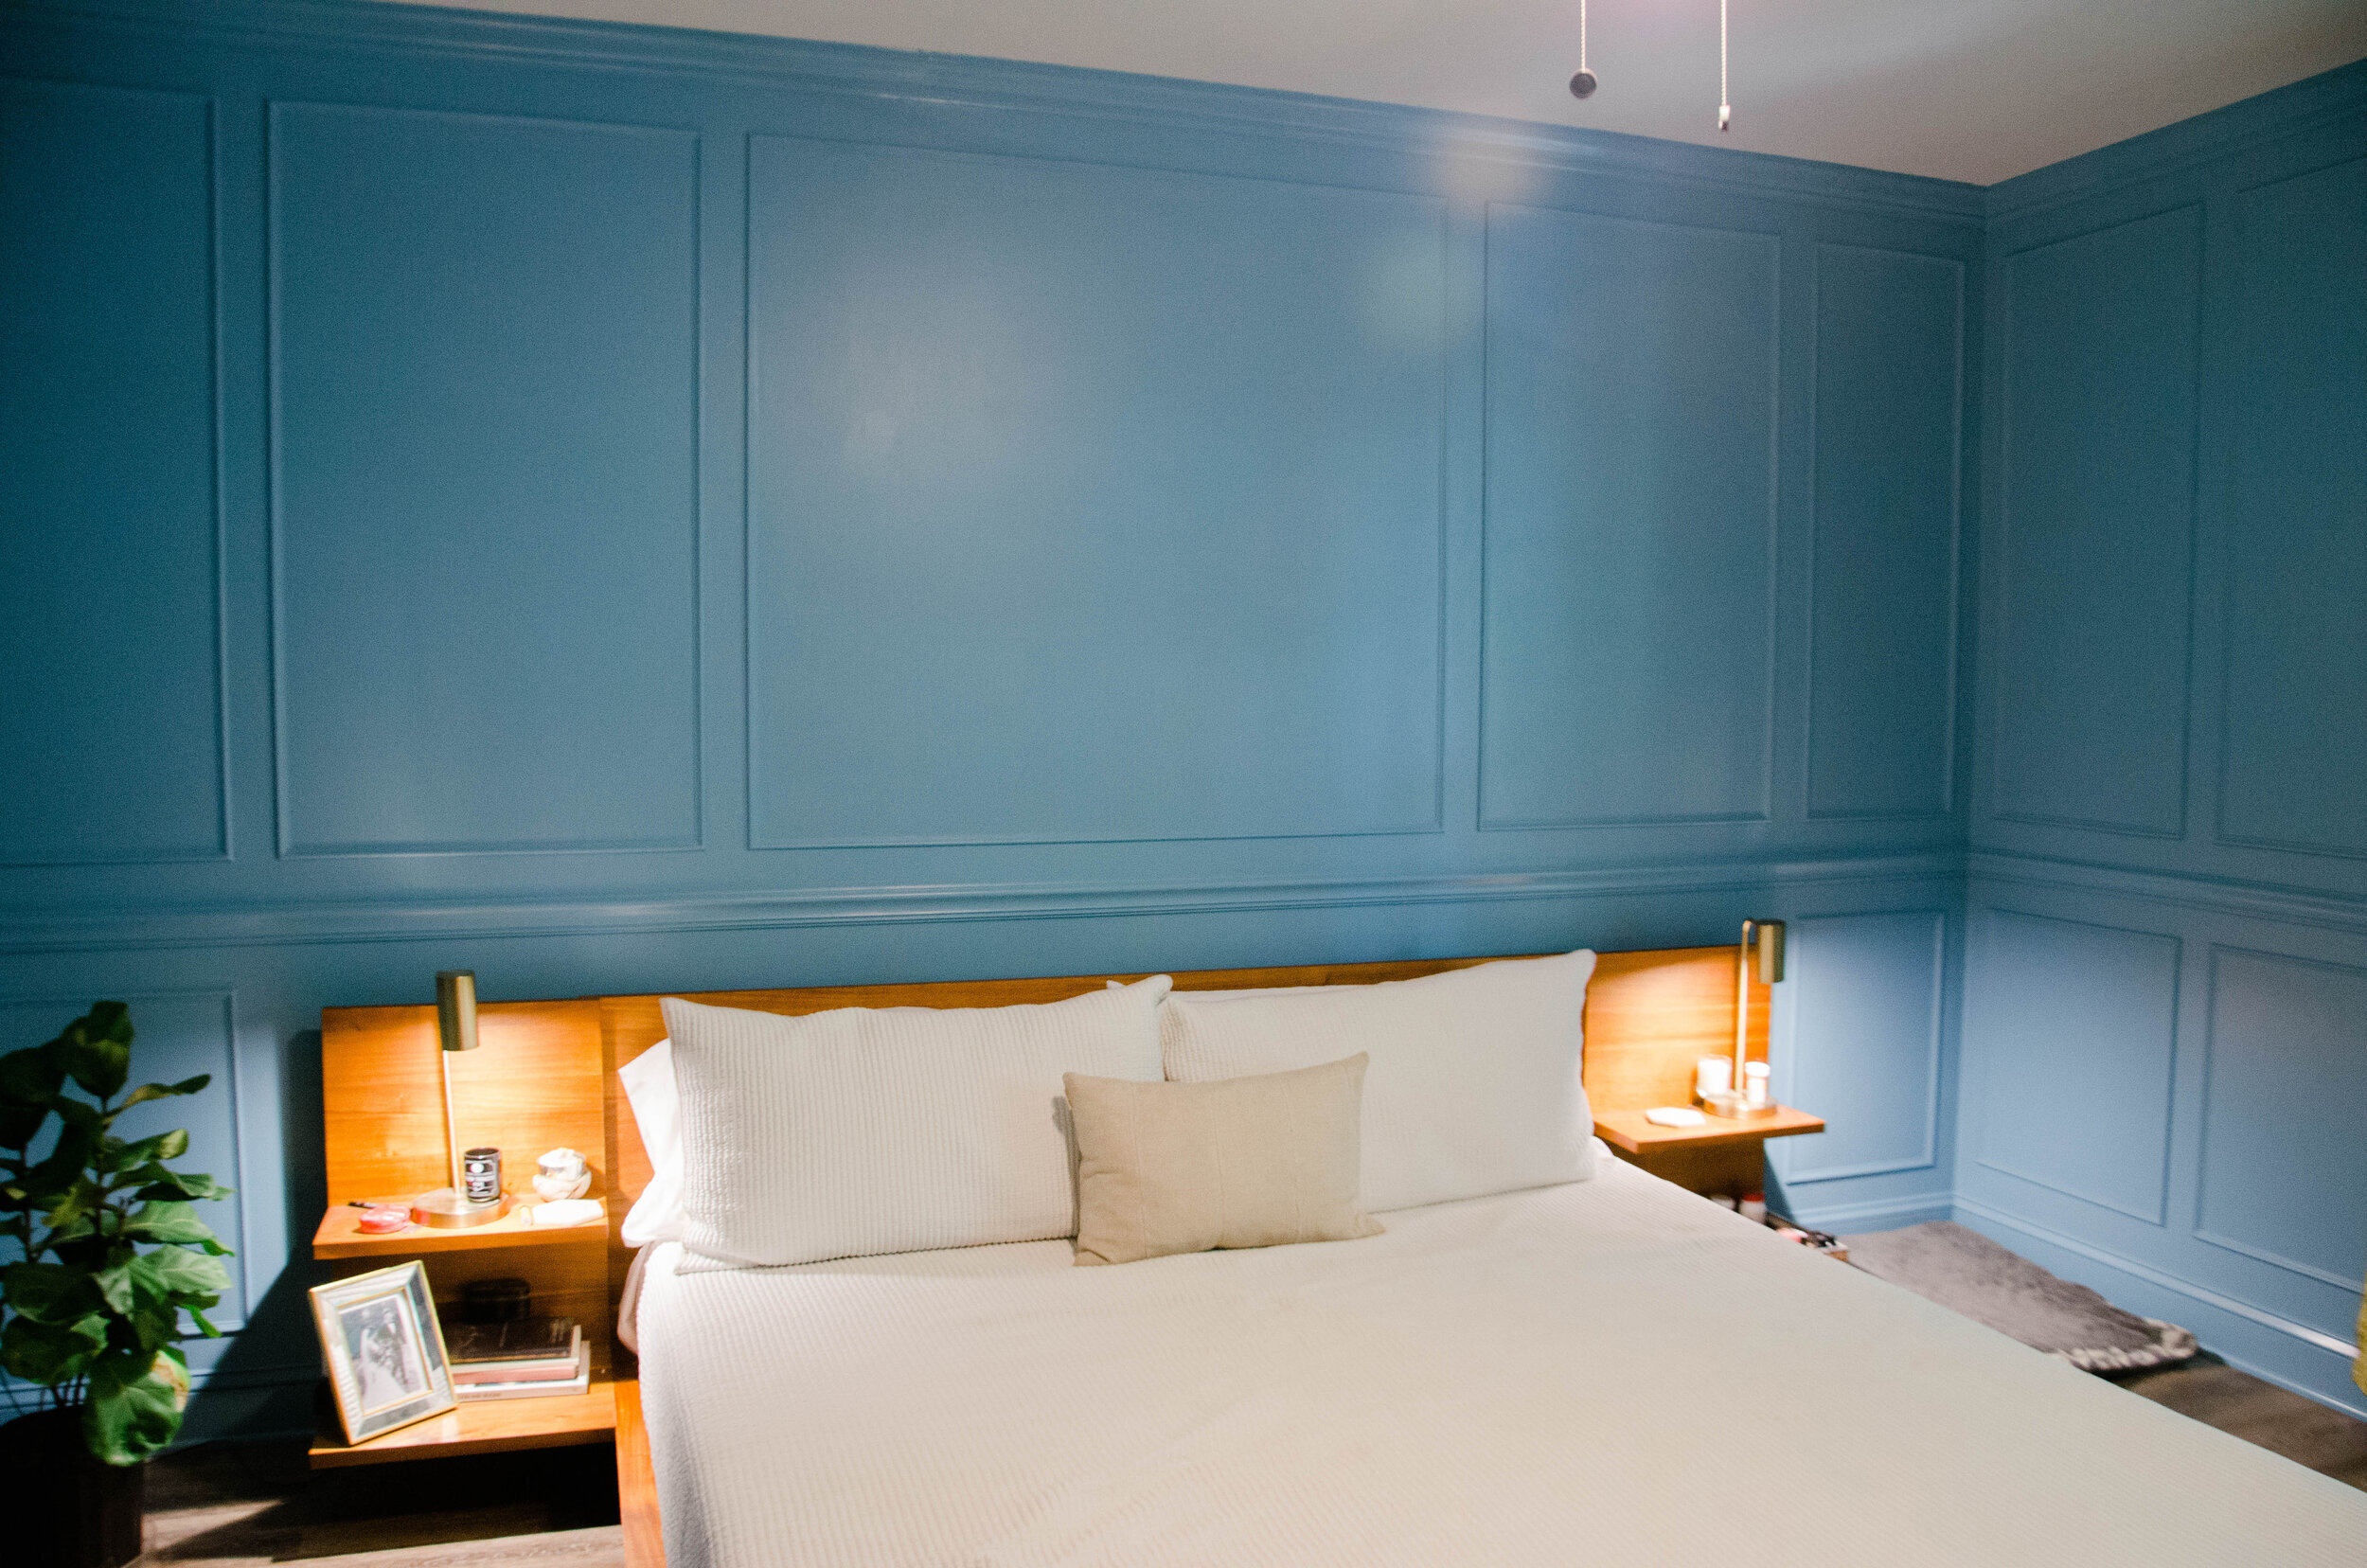
We. Love. It. It’s so lush and romantic. We feel like we sleep in a posh hotel room every night.
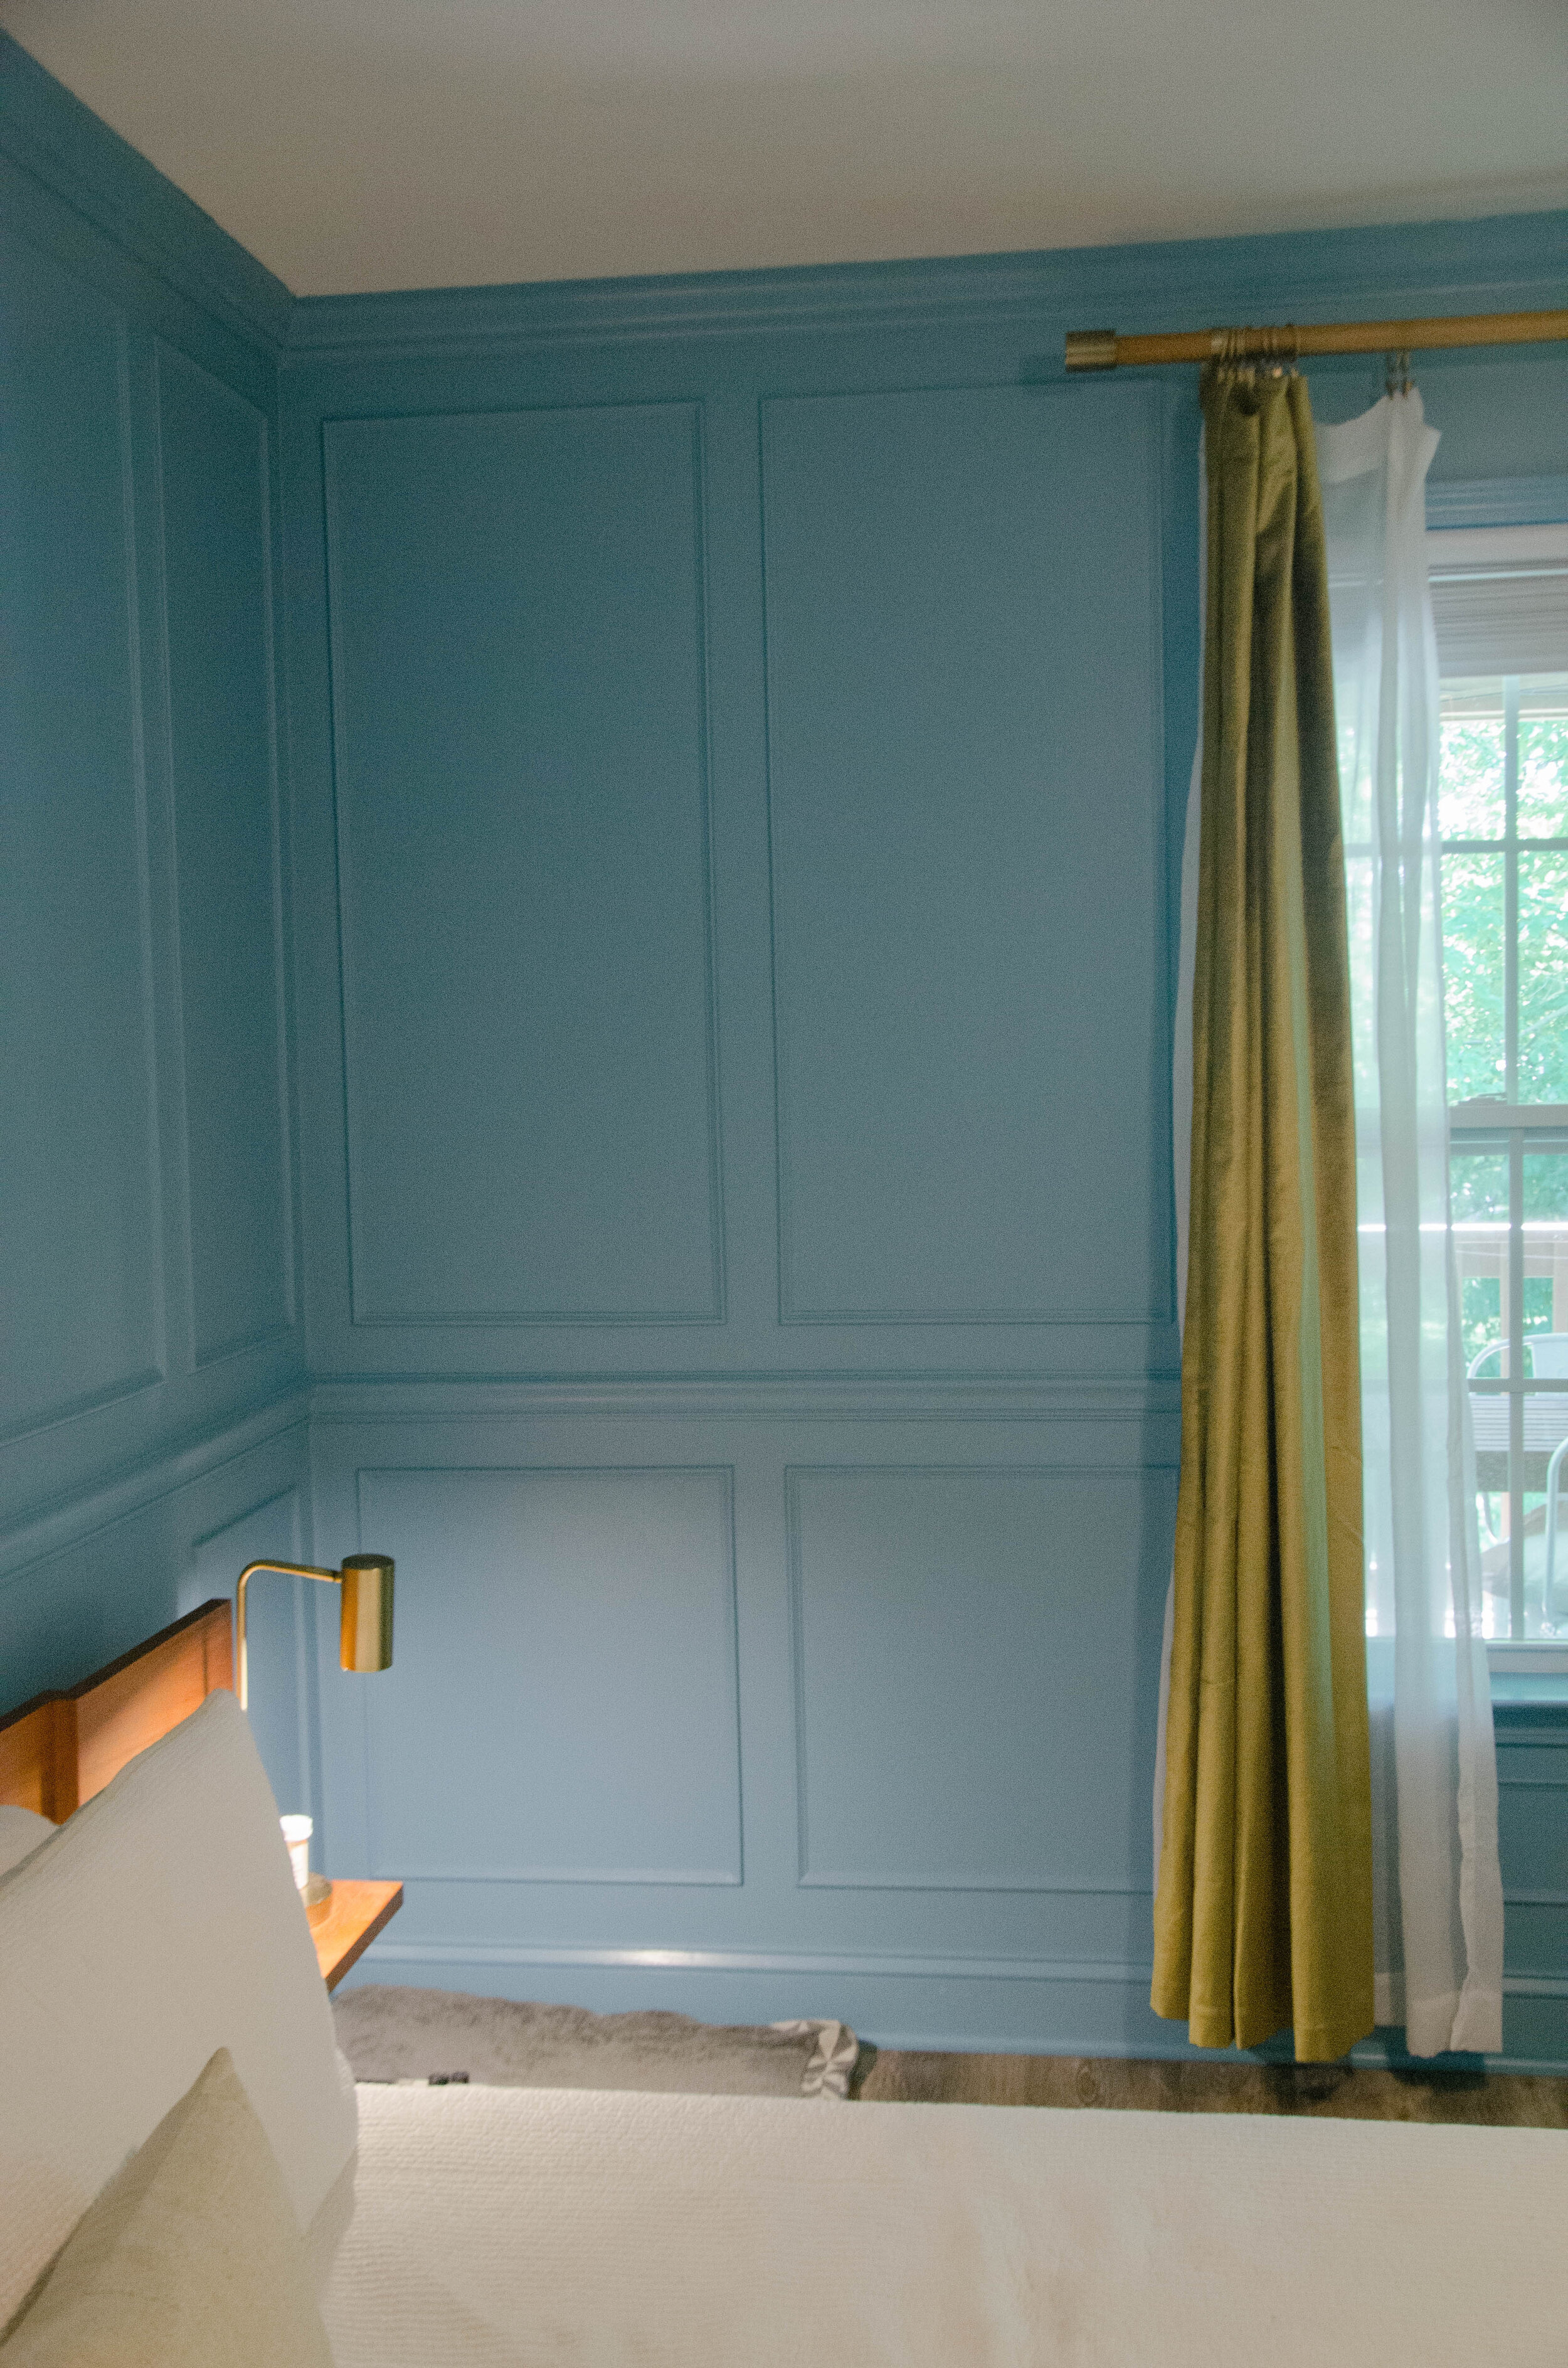
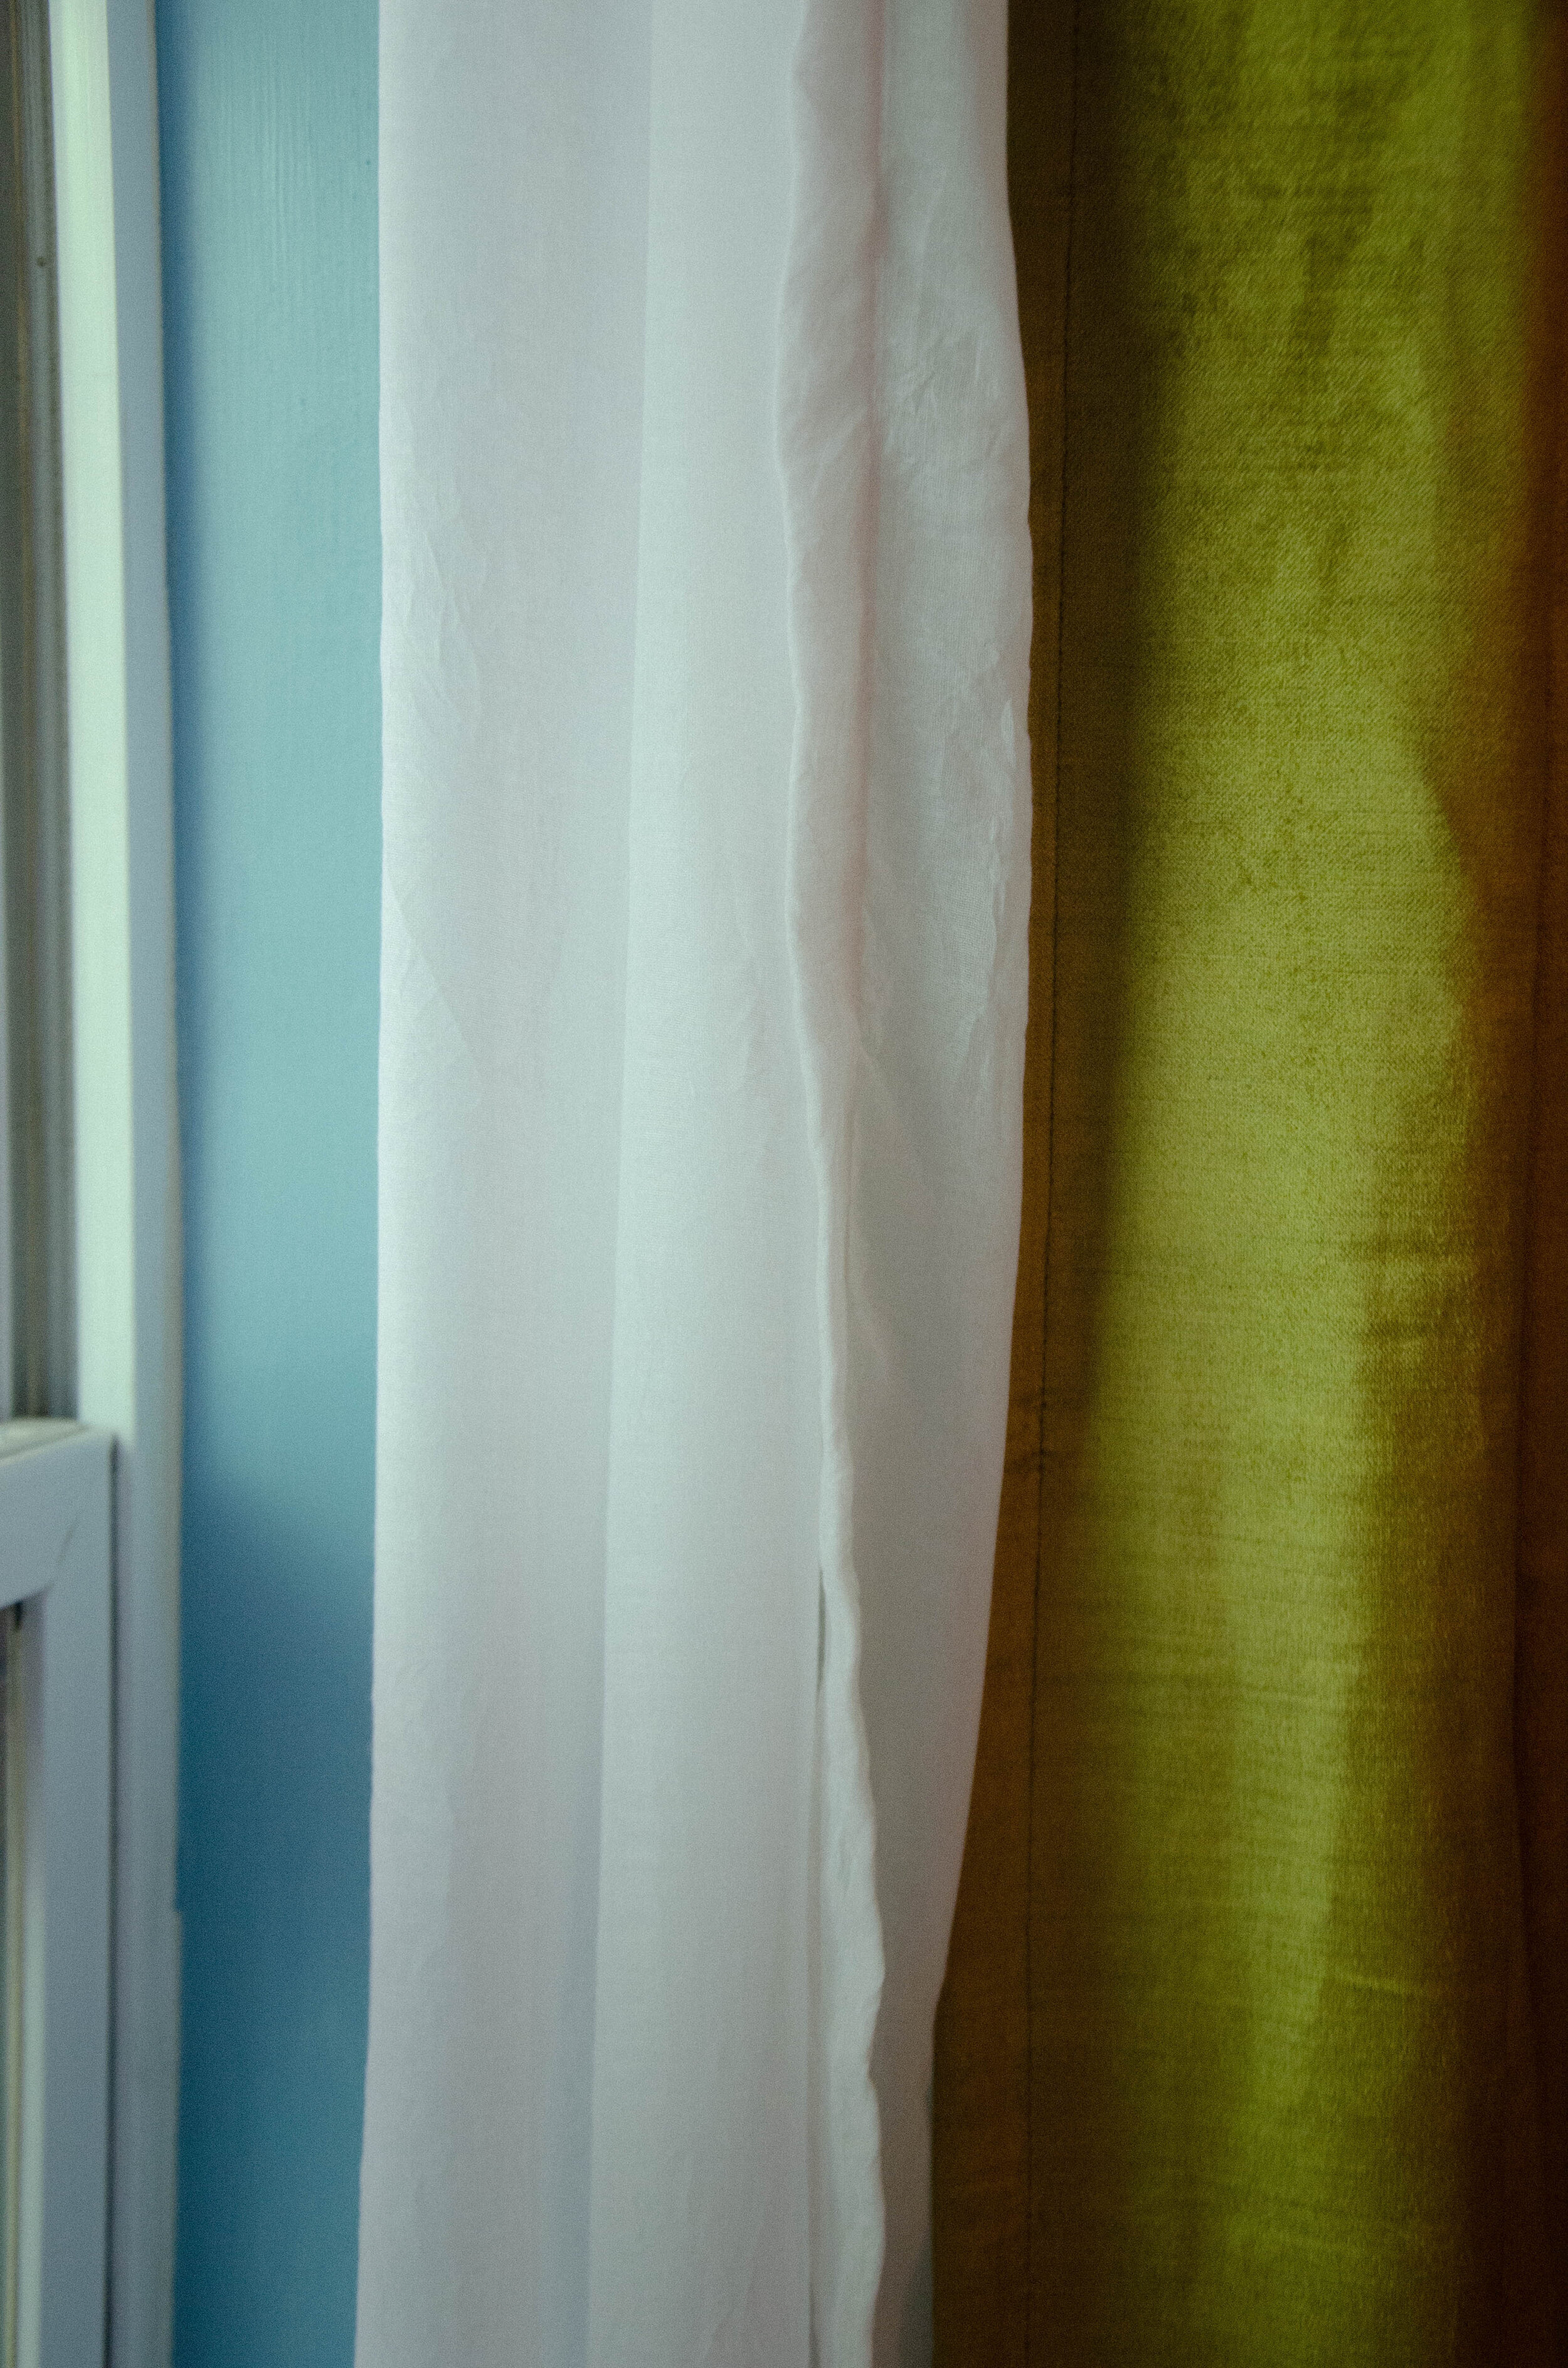
We got our fabulous velvet curtains from West Elm in the wasabi color. We went for their midcentury modern double curtain rod with the brass ends to match our night lights, which were from Target a while back.
Down the road, we’re swapping out our vintage French armoire for a low midcentury dresser. We’re saving up to commission a custom piece for over our bed and we’re still on the hunt for the right rug and pillows.
What do you think?! Would you put picture frame trim in your home?

How to Meet Your Neighbors During a Pandemic
Because we bought our home in May 2020, we found ourselves facing a conundrum: how do we meet our neighbors safely?
Because we bought our home in May 2020, we found ourselves facing a conundrum: how do we meet our neighbors safely? We wanted to throw a housewarming, invite our friends over, invite our neighbors to see the home they’d watched be renovated over the last two years, serve everyone beer and wine and snacks! Alas, we could not in good conscience do any of these things. SO instead I ordered these post cards from Moo (shoot me a message if you want 25% off your first order) and put them into mailboxes around our neighborhood. We’ve gotten emails and texts back and even a few neighbors who popped by to wave from the sidewalk.
![[image: an illustration of the front of my house which is dark grey with a light pink door]](https://images.squarespace-cdn.com/content/v1/5fac2dd6ecebbe4cd2cf7f94/1607037531941-5XGCL77F68JNPEY52KEV/an+illustration+of+the+front+of+my+house+which+is+dark+grey+with+a+light+pink+door)
[image: an illustration of the front of my house which is dark grey with a light pink door]

(I’ve cropped the bottom so it doesn’t show our personal contact info for…ya know… reasons).

We Bought A House!
On May 13th, we wore our masks into the escrow office and signed 1,342,678 pages with a sanitized pen. We left with a single key to our first home.
![[image: A photo of me, the top of a champagne bottle, my dog Potato, and Jackson, who is holding a house key, in front of our new home!]](https://images.squarespace-cdn.com/content/v1/5fac2dd6ecebbe4cd2cf7f94/1607037240153-NLYQ4Z7YNUIGFAJ9Z7U9/A+photo+of+me%2C+the+top+of+a+champagne+bottle%2C+my+dog+Potato%2C+and+Jackson%2C+who+is+holding+a+house+key%2C+in+front+of+our+new+home%21)
[image: A photo of me, the top of a champagne bottle, my dog Potato, and Jackson, who is holding a house key, in front of our new home!]
On May 13th, we wore our masks into the escrow office and signed 1,342,678 pages with a sanitized pen. We left with a single key to our first home. We ordered burgers from Joyland and called utilities companies getting everything set up in our name. We drove to the house, unlocked the door, popped some champagne, and sat on the floor, sipping and dreaming about what we’d put on the walls, who we’d have dinner with on the porch, whether this might be where we bring children home from the hospital.
We’ve been in this process since April 8th when we put in an offer; I was dreadfully sick and in and out of the hospital for the entire month of April. Home dreams kept me powered through finals while sick. It’s a joy to be able to actually share this news!
So this is home now.
I want to be super transparent about something that I think can be unnecessarily taboo: buying a home is a financially burdensome thing to accomplish. This is particularly true for our generation (#millennials, ya know?) and when you have limited income (two doc students in one house means we’re on a budget). We absolutely could not have done this without the generosity and kindness of our family. We are grateful to have people who could support us in transitioning from rent to real estate in order to build our equity while we complete our degrees. This is a privilege and I hope to someday be in the position to help someone else who otherwise would be renting make the same move. We are so, so grateful for you, familia!
We had an awesome realtor, Adam Blevens, and an amazing loan officer (and old friend), Josh Jeans. We highly recommend them if you’re in the Nashville area and you want real people (not a distant company) who prioritize what you prioritize and help make the process as smooth and stable as possible. Thanks you two! (And congrats to Adam and his family who welcomed their second baby girl the week after we closed!)
Here are a few photos for now. We will be doing quite a bit of work in terms of painting and redesigning a few things (knocking out a wall?). so stay tuned!
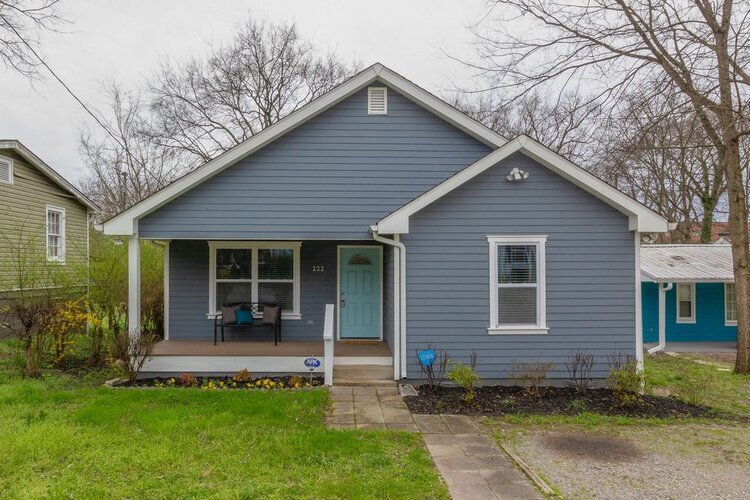
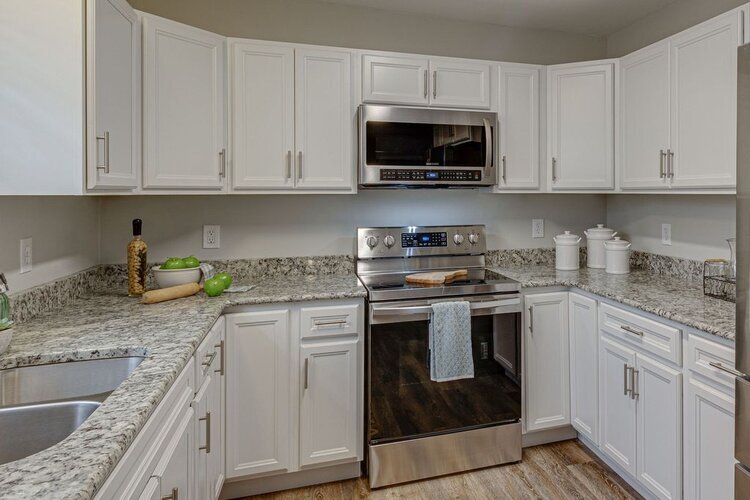
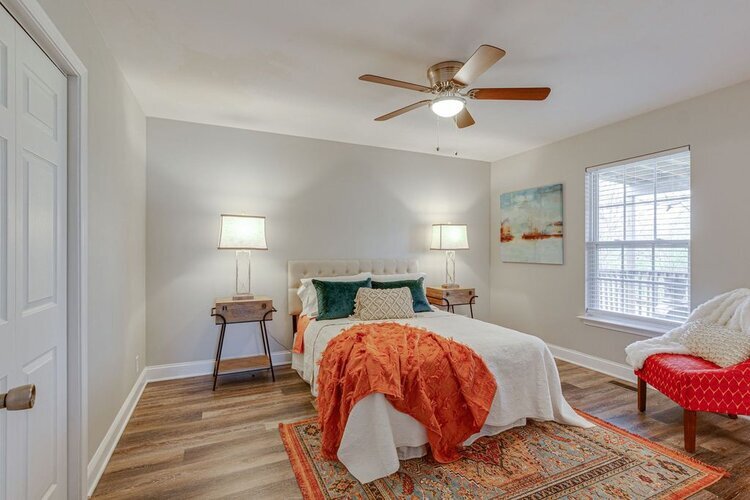
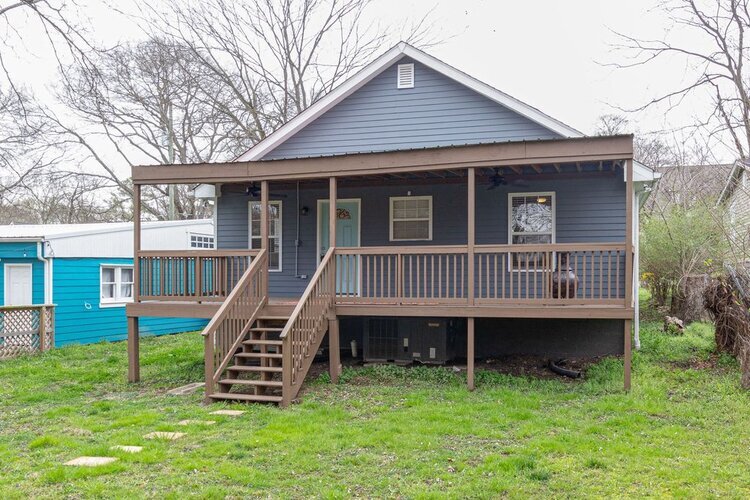
[four images: first, a photo of the exterior of our house which is one-story and blue-grey; second, a photo of the kitchen with white cabinets; third, a photo of the main bedroom, with a ceiling fan, a queen size bed and two nightstands; fourth, a photo of the exterior of the back of our house, which has a porch the width of the house]

Goodbye, wallpaper. Hello, paint!
When wallpaper is too expensive but you still want a pop of color and pattern in a space, painting is the way to go.